Showing posts with label crafts. Show all posts

Tuesday, October 21, 2014

The Ultimate Halloween Party

Last weekend, I hosted a Halloween party for eleven third graders. It was a blast! I was going to write a really lengthy post with all of the details of the party and the "how-to's" of party planning... but I decided you'd rather just look at the pictures. PLUS, I realized that I didn't snag pictures of ALL of the games, prizes and decorations (sometimes you just have to live in the moment!) so here are some of the highlights of the Ultimate Halloween Party.

When the children first arrived, I had three main areas for them to wander between. The first was a Zombie Warrior Training Zone. 
I set up some bales of hay and tied on balloons with Zombie faces drawn on them. I had a pile of sticks set next to the hay for the kids to pop the Zombies with and sharpen their swordsmanship.
Then I had a Can Knockdown game set up for the kids to test their strength. 
This game was a lot of fun to make! I recycled my cans and painted them as pumpkins, ghosts, black cats, Frankenstein's monster, and a mummy.
I also had a Craft Table set up. 
The Craft Table had three stations. At the first, the kids could decorate their treat bag with Halloween stickers, stamps, and markers. At the second, I had a Halloween Cootie Catcher (which I found here: http://catchmyparty.com/blog/free-halloween-party-printables-from-b-nute-productions) printed and cut out, ready for the kids to fold. The third was Halloween tattoos. Unfortunately, it was really windy the day of the party so I had to use rocks to hold everything down, but we managed to make it work.

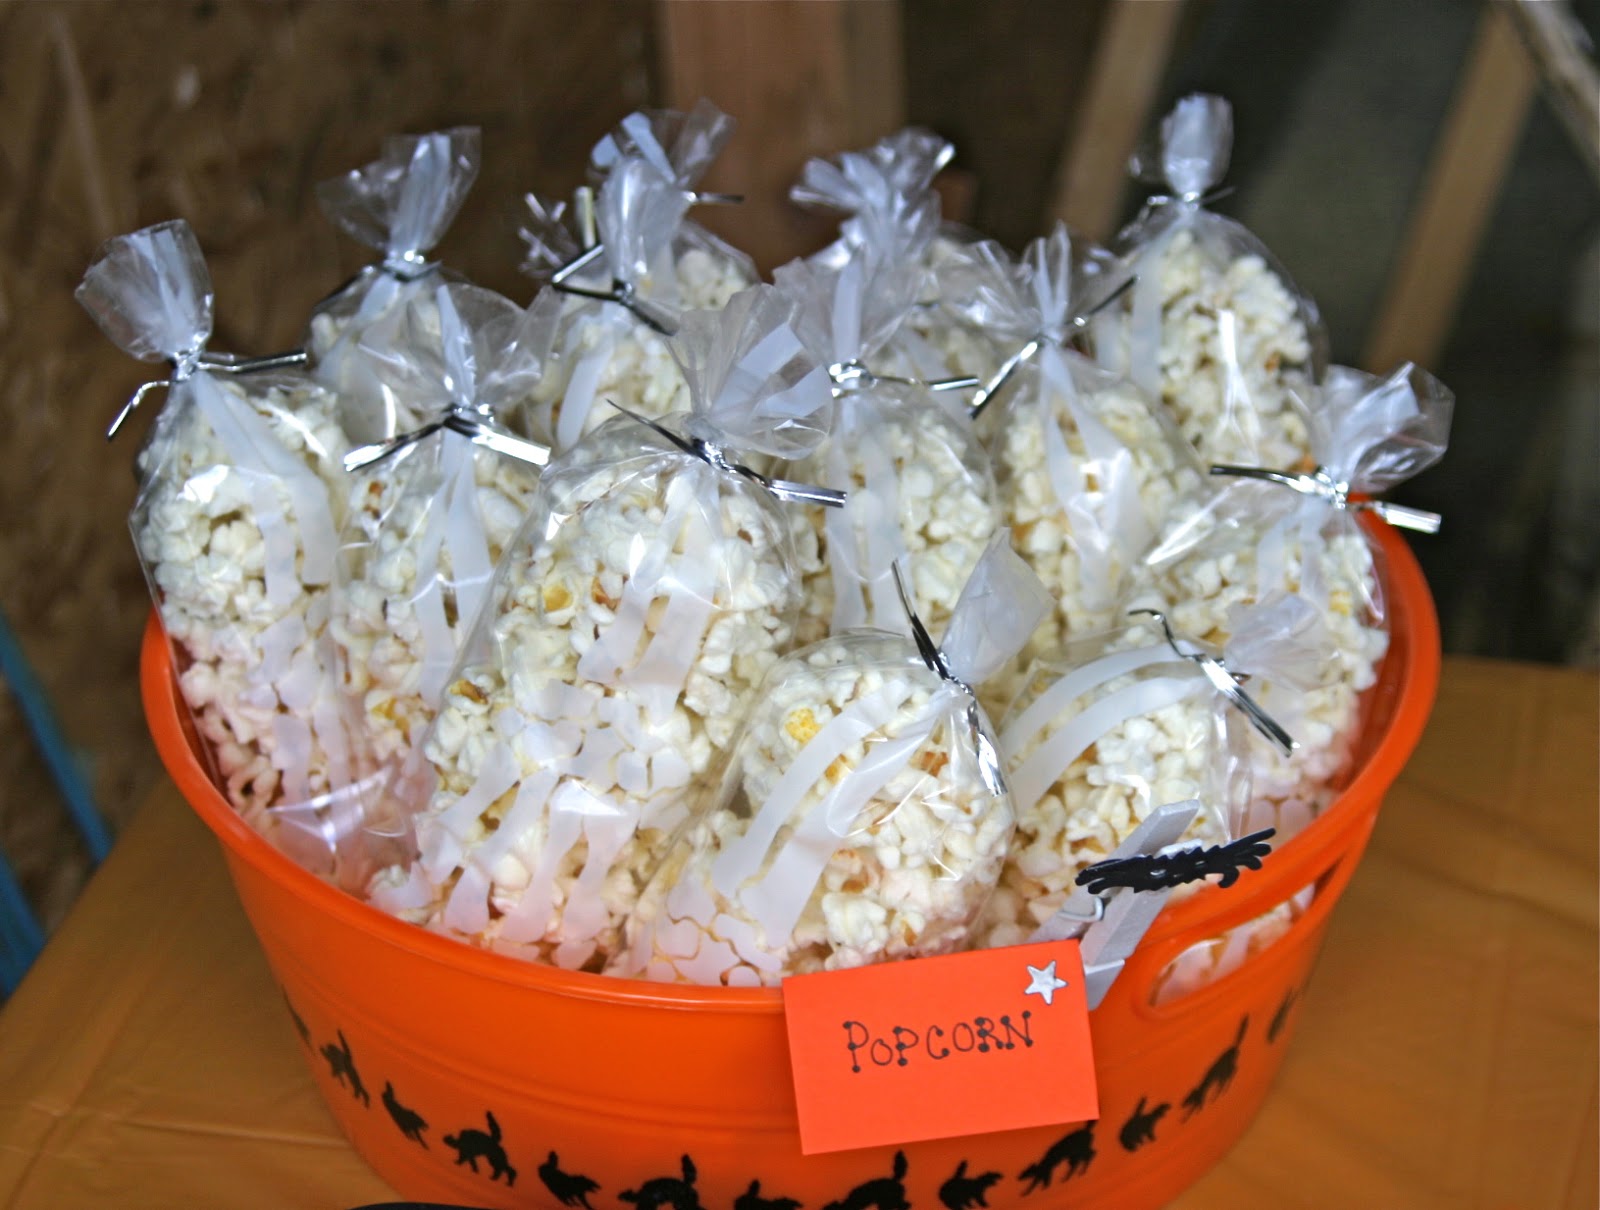
Last, I had the Food Table. I tried to have a variety of snacks, all with a Halloween twist!


The Autumn Mix consisted of pretzel sticks, Chex corn cereal, Count Chocula cereal, M&M's, and a candy corn mix (with the pumpkins).


The spiders were made from peanut butter (I made sure there were no peanut allergies at the party), Ritz crackers, pretzel sticks, and chocolate chips.

For the first half hour of the party, I let the kids roam between the three areas. As I suspected, the boys spent most of their time in the Zombie Warrior Training Area (and running around) and the girls stayed closer to the Craft and Food Tables, but all of the kids did go back and forth between all of the areas. Once everyone had arrived and had a chance to run around, we started the games!

The first game is what I like to call the Pumpkin/Bozo/Grand Prize Game. Did you ever watch “The Bozo Show” when you were little? (Fun Fact: Bob Bell aka “Bozo the Clown” was a fellow Flint native.) Towards the end of the show, Bozo would pick a child to play the “Grand Prize Game” (If you aren’t familiar with it, you can watch a clip of it here: http://www.youtube.com/watch?v=B9IMebdCT6s). The game consisted of five buckets in a row and each bucket was associated with different prizes, getting bigger and better with each further bucket. The child would stand in front of the row of buckets and had to throw a ping pong ball into each bucket in order to get the prize associated with it.  This game was similar to the Grand Prize Game, but with a Halloween twist. 

I spray painted a long board black and screwed 5 plastic pumpkins into the board in a row.
I drew a chalk line on the cement where the kids were supposed to stand and had them line up behind it. I had 5 different prize buckets and let them choose prizes from each bucket that they were able to throw the ball into.
The game worked well, but I would recommend using a small bean bag instead of the ping pong ball.  The ping pong ball made the game a little too difficult for this age group.

The next game we played was Poke-A-Pumpkin. I've done a pinata for years (see my tutorial on how to make a pinata here) and have gotten tired of doing the same thing over and over again. I started searching Pinterest for an alternative to a pinata and found this gem. To make the game, I took an old canvas (you could easily use a foam board) and spray painted it black. I then hot glued orange cups onto the canvas. I then put different prizes and candy into each cup and covered it with tissue paper and a rubber band. The kids lined up and took turns poking a cup and taking the prize inside.
I wasn't sure how this game would go over with this age group because the game was so simple, but the kids loved it and I had enough cups for them to each go twice. Although the hot glue worked out alright, I would recommend using Epoxy glue. I think it would hold better.

The next game we played was the Wrap-A-Mummy game. I had the kids get into teams of two. We happened to have eleven kids at the party, so we made one of the teams have three kids. I then had them decide who the "Mummy" was going to be. I gave them a roll of toilet paper and told them that the first team to most carefully cover/wrap their mummy the fastest would win.
The kids did a great job with this game! I thought for sure that they would be running around each other throwing the toilet paper all over the other kid, but they were all very careful and took their time wrapping their mummy.

We also played two other really fun games but sadly, I didn't get any pictures of those games. Perhaps I'll save them for next year and tell you all about them then!

All of the kids appeared to have a really great time and I had a great time hosting! 

As always, thanks for reading and let me know if you end up having your own Ultimate Halloween Party!
   

Tuesday, November 19, 2013

Cinnamon Cut Out Ornaments

   One of my favorite things to do with my son during the holiday season is to make homemade ornaments for the tree. They're fun, creative, and make great gifts! If you haven't seen my other post about homemade salt dough ornaments, you can find it by clicking here. Cinnamon Cut Out Ornaments are one of my favorite kinds of ornaments to make because they're really easy to make, smell delicious and look adorable. Enjoy!


Cinnamon Cut Out Ornaments 
(For decoration only! DO NOT EAT!)

1 Cup Ground Cinnamon
2/3 Cup Applesauce
1 Tbs White Glue

1. Mix all of the ingredients (the cinnamon, applesauce and glue) together.

 
2. Roll out to about 1/4 inch thick on a surface sprinkled with extra cinnamon. Cut shapes with cookie cutters and lay flat on wax paper. Use a straw to make a hole at the top for the string.


3. Turn over frequently for the next 2-3 days. Let them dry completely. 
4. Once completely dry, you can decorate with fabric paints or glitter glue, or just leave them as they are!

Don't forget to share with someone you love!


Friday, January 25, 2013

Harry Potter Party

   I recently threw a Harry Potter birthday party for my son. I thought I would share some of the details of the party with you with the hopes that someone else might find it useful. Seeing as how there is NO Harry Potter party section at most of the chain party stores, if you plan to host your own party you should be prepared to do your homework and GET CREATIVE!

Invitations
: I didn’t realize that the party pack I ordered online (more on that later) included invitations, so I made my own. I created the invitation document to look like an official letter from Hogwarts (in green ink and all) inviting the child to come to the school for a special party. I also included a separate train ticket to platform 9 3/4. If you are familiar with the book, this will all make sense. If you haven’t read the book, you have a lot of work ahead of you! I didn't take a picture of the invitations, but I provided a link to another blog at the end of this post with an example of someone else's invitations which looked very similar to mine.


Party Supplies: I was unable to find any Harry Potter party supplies in any of the stores I visited, however I was able to find them online. I discovered that Target sold a party pack online (but not in the stores). The pack included 2 different sizes of themed plates, napkins and cups, a blue tablecloth, maroon and gold balloons and curling ribbon,  maroon and black crepe paper, a “sorting hat”  helium balloon, themed party invitations, black eating utensils and blue candles. The price was a pretty good deal for the amount of stuff, so I ordered it. This was enough plates, napkins, and utensils for the amount of guests we were going to have, so I didn't need to buy anything extra.

 
Party Decorations: Although balloons and crepe paper can take you pretty far with kids (as far as decorations go)...


...I knew I was going to need more stuff, so I went to my favorite store for party supplies: The Dollar Tree. This particular dollar store chain is great for party supplies and the price for the quantity of things you get (like plates, napkins, etc.) is way better than the packs you can buy at the larger party stores. I picked up a few nice touches like these:


Although the dollar store and the party pack I ordered were helpful, I ended up making most of my themed decorations like this banner:


(This shot turned out a little funny because the sun was so bright but you get the idea.)
And these signs:


I got the printouts from a blog that was incredibly helpful during my planning. I’ll share that with you at the end!

Games and Activities
: I like to have the games at my parties correlate with the theme of the party as much as possible, but sometimes you have to consider other factors. These include the number of children attending the party, the kind of kids that will be at the party (is it a wild boy crowd? a calm group of girls? etc.), how many adults will be around to help, how much time you have to fill, and several other things that can affect your game choices.

For example, one of the games I planned on playing involved two teams of 3 kids. Each child would have a Popsicle stick in their mouth and the children would have to pass a pretzel on the stick to the stick of the child next to them. The last child in the line would drop the pretzel from the stick in their mouth to the bowl they would be holding. After being timed for a minute, the team with the most pretzels in their bowl wins. This sounded like a fun, competitive game, however, we received one cancellation on the morning of the party which would have messed up the number of children on each team . Plus, several children had been out of school that week for the flu, so I didn’t think passing food items onto sticks in mouths sounded like a good idea. Luckily, I had enough other activities that filled the time nicely.

One of the things I liked that I saw on some of the blogs that I referenced staging the activities/games as “classes” at Hogwarts. One of the classes that looked like fun was the potions class. While I really liked this idea and thought it could be very successful with the right crowd, I wasn’t thrilled with the idea of several little boys mixing liquids at my dining room table. It sounded a little too messy for my liking! I wanted to do something that resembled a magic potion though, so I considered having the children dump Pixie Stick powder into jars that looked like they held magic potions. However, when I got to the Dollar Tree (again, best dollar store ever!), I found these glow-in-the-dark sand art kits that were perfect...and only $1! The kit included 3 bags of colored sand, a container with a lid, a funnel, and a stick (to create designs). Amazing! This was the first activity I had the kids do. I called it “Magic Sand Potion Class” and it went surprisingly well. The children were very careful about their sand creations and were very excited when they discovered that they could take them home!


After sitting still for so long (and concentrating so carefully on pouring sand into a tiny funnel), I knew the kids would need to move around, so I had them play “Magical Musical Chairs” next. This was a great way for them to burn off some energy and they had a great time dancing to the music! (By the way, I didn’t do anything special from the normal way of playing Musical Chairs, I just gave it a fancy title.)

The next game we played was “Catch Hedwig Before He Flies Away”. This game was basically like the traditional fishing game, but with owls. To create the “Magic Pole” (or fishing pole), I tied a piece of yarn onto a wooden dowel that I already had. I then hot glued it in place and glued a refrigerator magnet to the end of it. Then I cut out 10 owl shapes from construction paper and wrote the numbers 1-5 on them. I laminated them with my top-secret-super-cheap laminating system (i.e. clear Contact Paper from the shelving paper section of Walmart) and put 2 paper clips at the top so that the magnet would be able to pick them up.


I had each child kneel backwards on a chair and hold the pole over the top. They then had a minute (I timed with the kitchen timer) to catch as many owls as they could. I wrote down the numbers as they caught the owls and the child with the highest total was the winner. I was surprised at how carefully the boys tried to catch the owls with the higher numbers. They were great! Of coarse, the ones waiting in line basically beat on each other while they waited, but the game went very smoothly. The kids were really excited to help add up their numbers and figure out their grand totals.

Next, I had the kids grab some snacks to munch on at the table while they played their last game. I knew the game would take up quite a bit of time, so I wanted something to keep them busy while they sat so nicely for so long. Harry Potter Bingo was the final game. This game took the most time to create but it was worth it. To create the bingo board, I used a larger size piece of white paper and made it big enough for about 1 1/2 inch rows (5 x 5). I left space at the top to write Bingo. For the pictures that were going to go in the squares, I Googled black and white coloring pages of various themes (Harry Potter Coloring Pages, Dragons, Cats, Eyeglasses, etc.). I copied and pasted the pictures on to a Pages document (or Word) and played around with the size until I got all of the pictures small enough to fit perfectly inside of the squares I drew (this took a couple times of printing and then going back and resizing and printing again). I used about 28 different images. I printed several copies of the images and then cut out all of the little pictures and glued them randomly on to the Bingo boards, leaving a “Free” space in the middle. I made sure that no two Bingo boards were the same. I then covered the Bingo boards with my top-secret-super-cheap laminating system so that the pictures couldn’t be peeled off from the boards. I cut up an extra set of the pictures along with the letters BINGO and put those in a small plastic bag to use to call out during the game. For the Bingo markers, I purchased some small green vase gems from the Dollar Tree and put them in the middle of the table.


This game went very well and took up a lot of time. The children sat still very nicely and munched on snacks while waiting to hear what picture would be called next. Even though some of the children weren’t familiar with the characters in the book, they quickly caught on to the names and images that were on the Bingo boards. Towards the end of the game, I started to peek at what was left on some of the kids’ Bingo boards so that I could specifically call out those images and letters (so that everyone won a prize by the end). The games and activities went VERY well and took up about an hour and a half, which was perfect!

Food/Cake: I didn’t do much in the way of food because our party was held in the middle of the afternoon (not during any major meal times). I simply put out a good mix of a few snacks (my son’s favorite kinds of chips, carrots, strawberries, cheese, etc.).


I saw a lot of really wonderful ideas on the blogs I looked at for how to set up a beautiful spread of food and candy with clever titles and cute labels, but I didn’t get that fancy. If I were to throw another Harry Potter party for adults (or a larger number of children AND adults), perhaps I would make more of an effort.       

For the cake, I saw a really cute idea on Pinterest (so wonderful for craft and food ideas!) for owl cupcakes. This went along with the theme perfectly so I recreated those.


They were really easy to make and the kids (and parents) loved them! I baked chocolate cupcakes and frosted them with chocolate frosting. The eyes were created with Oreo’s (which needed to be sliced through the cream with a knife, not twisted apart) and Junior Mints. The beak was made with a banana candy from a package of Wonka Runts. I used a little white frosting in a tube for the owl feathers. They were adorable!

Prizes/Goody Bags
: For prizes, I mostly purchased special candy from the party store (Party City) and threw in a couple of non-candy items. I wrapped the prizes and put them in a bag and let the kids choose their own prizes. I learned my lesson on wrapping them from a Halloween party I hosted back in October. For that party, I just put all of the prizes in a bag and let the kids pick out their what they wanted. This didn’t work so well because the kids took FOREVER to make a decision and the other kids started to complain that the prize they wanted was already taken, it wasn’t fair, etc. Anyhow, so I wrapped them this time. The biggest hit for prizes was a mini basketball game/whistle/sucker thing.

For the goody bags, I purchased gold bags with handles from Michael’s. Some of the goody’s included Snape’s Slime (which was noise putty from the Dollar Tree that I relabeled):


Bertie Bott’s Every Flavour Jelly Bean’s (which were normal jelly beans that I repackaged and labeled):


I also threw in some other wonderful surprises (Come on, I can’t give away ALL of my secrets)!

Magic Wands
: I debated for awhile on whether or not to hand out magic wands upon the children’s arrival (like they were arriving to Hogwarts and were given their wands as a gift for entering Wizard School) or upon their departure. Last year, I threw a pirate themed birthday party and dressed each child up upon their arrival with a head wrap, eye patch, earring, and gave them each a sword. This led to intense sword fighting for the next 20 minutes, but that was what I wanted! We had rented a large open room where the kids could run around and be crazy, so it worked (although I’m sure there were a few minor pokes and whacks). But this party was going to be held in my house and these wands were a little bit more pointy at the top, so I didn’t want them to turn into swords and eyes to get poked out. I wisely waited until the end of the party to reward each child with their wands and I’m really glad I waited.

To make the magic wands, I purchased two thick dowels from Michael’s and cut them into 3’s with a table saw (THANKS DAD!). I then took a hand saw, and cut a notch all around the dowel about an inch and a half from the bottom. I sanded the notch so that it would be smooth. This was going to be the part that the child would hold. Then I took the other end and sanded it with a high grit sandpaper until it started to create a point.


I then painted the wands with two coats of brown paint and sprayed it with a acrylic sealer. I was quite proud with the way they turned out and my son was thrilled with how “realistic” they looked!

   I hope you will find this blog entry helpful if you decide to plan your own Harry Potter party. Some of the blogs I found most helpful were this one: http://justsweetandsimple.blogspot.com/2011/07/harry-potter-party.html, for the free printables, and this one: http://myharrypotterparty.blogspot.com/2009/03/invitation.html, for the invitation idea and potion class idea. Both of these blogs were amazing! These people got VERY elaborate with their parties and pretty much transformed their whole houses into Hogwarts! I wasn’t willing to get that fancy, but they were really great for ideas and inspiration. I also used Pinterest quite a bit!

   This party was a lot of work but a lot of fun! The kids had a great time and I thought it was a big success! Please keep in mind that this party was planned while I was working full time and traveling between Michigan and Massachusetts, so if I can do it, trust me YOU CAN DO IT! Enjoy! 

Tuesday, January 22, 2013

Recycled Art

   My son is really into recycled art! He just loves taking something that would normally be thrown out and turning it into something new! His passion recently inspired me to try my hand at a recycled art project. I took a good look around the house to see what kind of materials I could use. One item that we always have a lot of (but usually just recycle) were paper towel/toilet paper rolls. Back in the day, when I taught preschool, I used to save our rolls for the kids to use for art projects (they make great binoculars!). But I wanted to find a more adult project that I could use the rolls for. Now where, you might ask, is a good place to look for a plethora of ideas on what one can make out of paper towel rolls? Pinterest, of coarse! Within minutes I found some pretty unbelievable creations that people had made simply by cutting and hot gluing the rolls together.

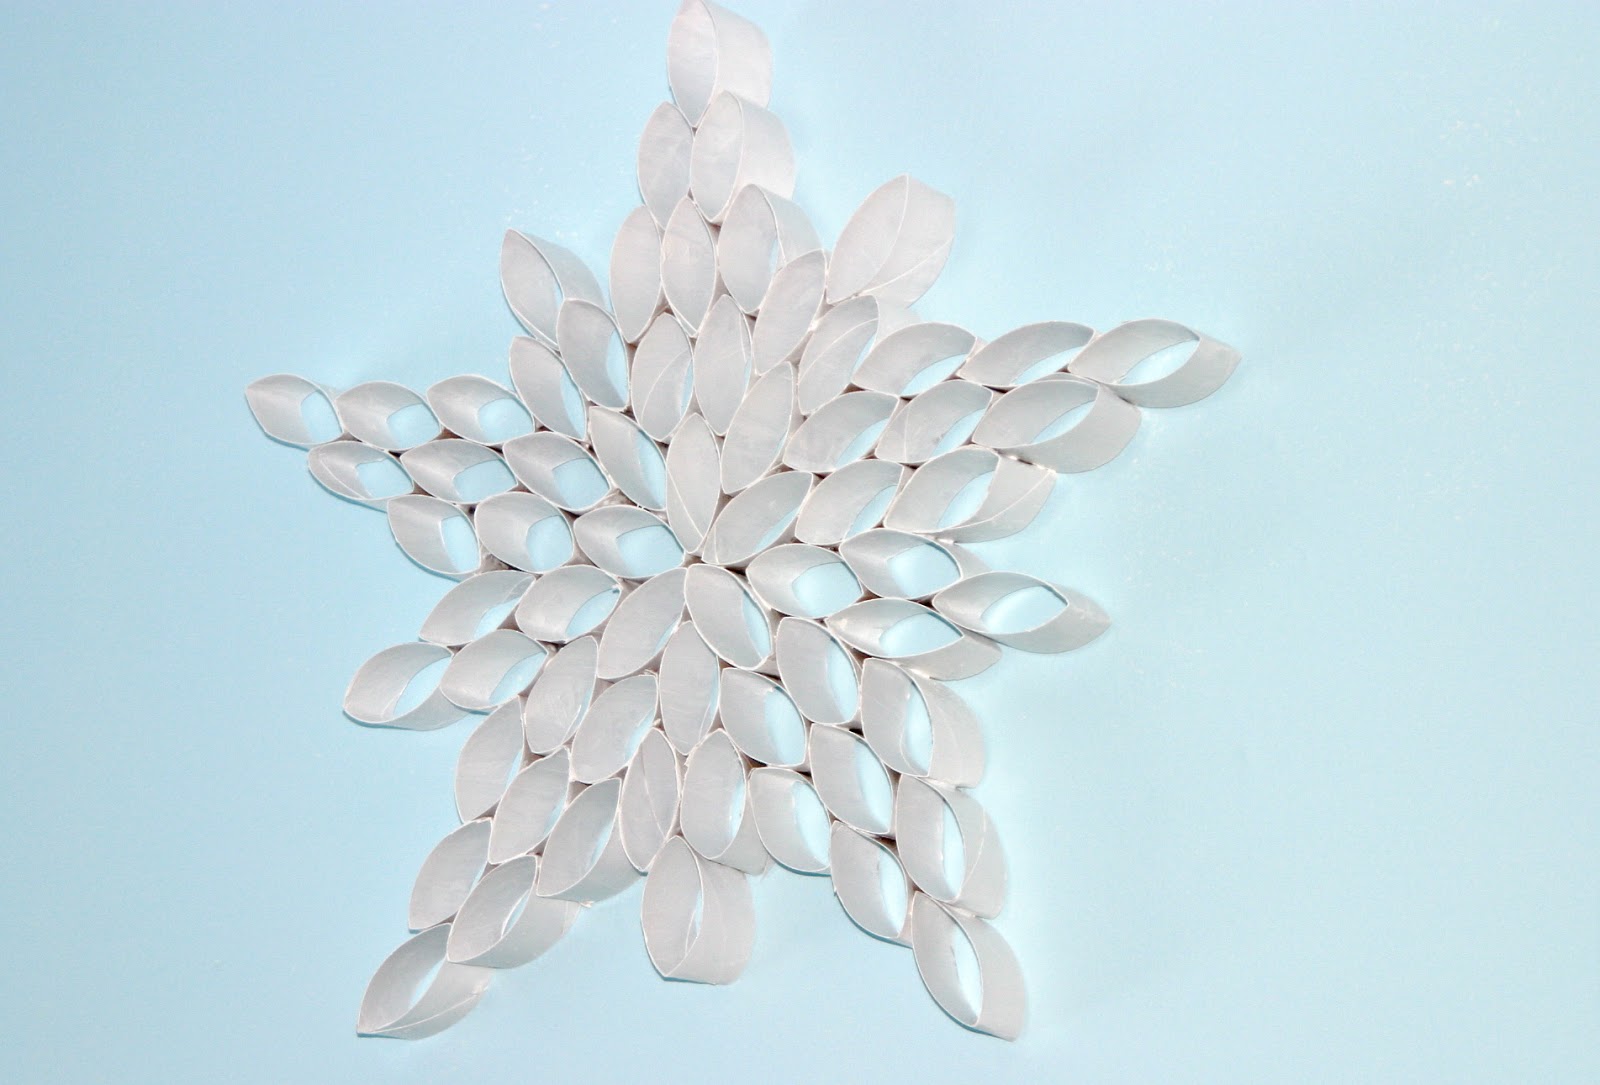
   One design I really liked was a star. I'm quite fond of stars and I had been looking for something to hang on our bedroom wall. I saved our rolls for a couple of weeks and got to work on my creation. First, I cut the rolls into about 1 1/2 inch sections. This smashed the rolls to give them their flattened oval shape. Then I tried out a couple of different designs by arranging the rolls on the table. Once I found a design I liked, I started hot gluing them together. 

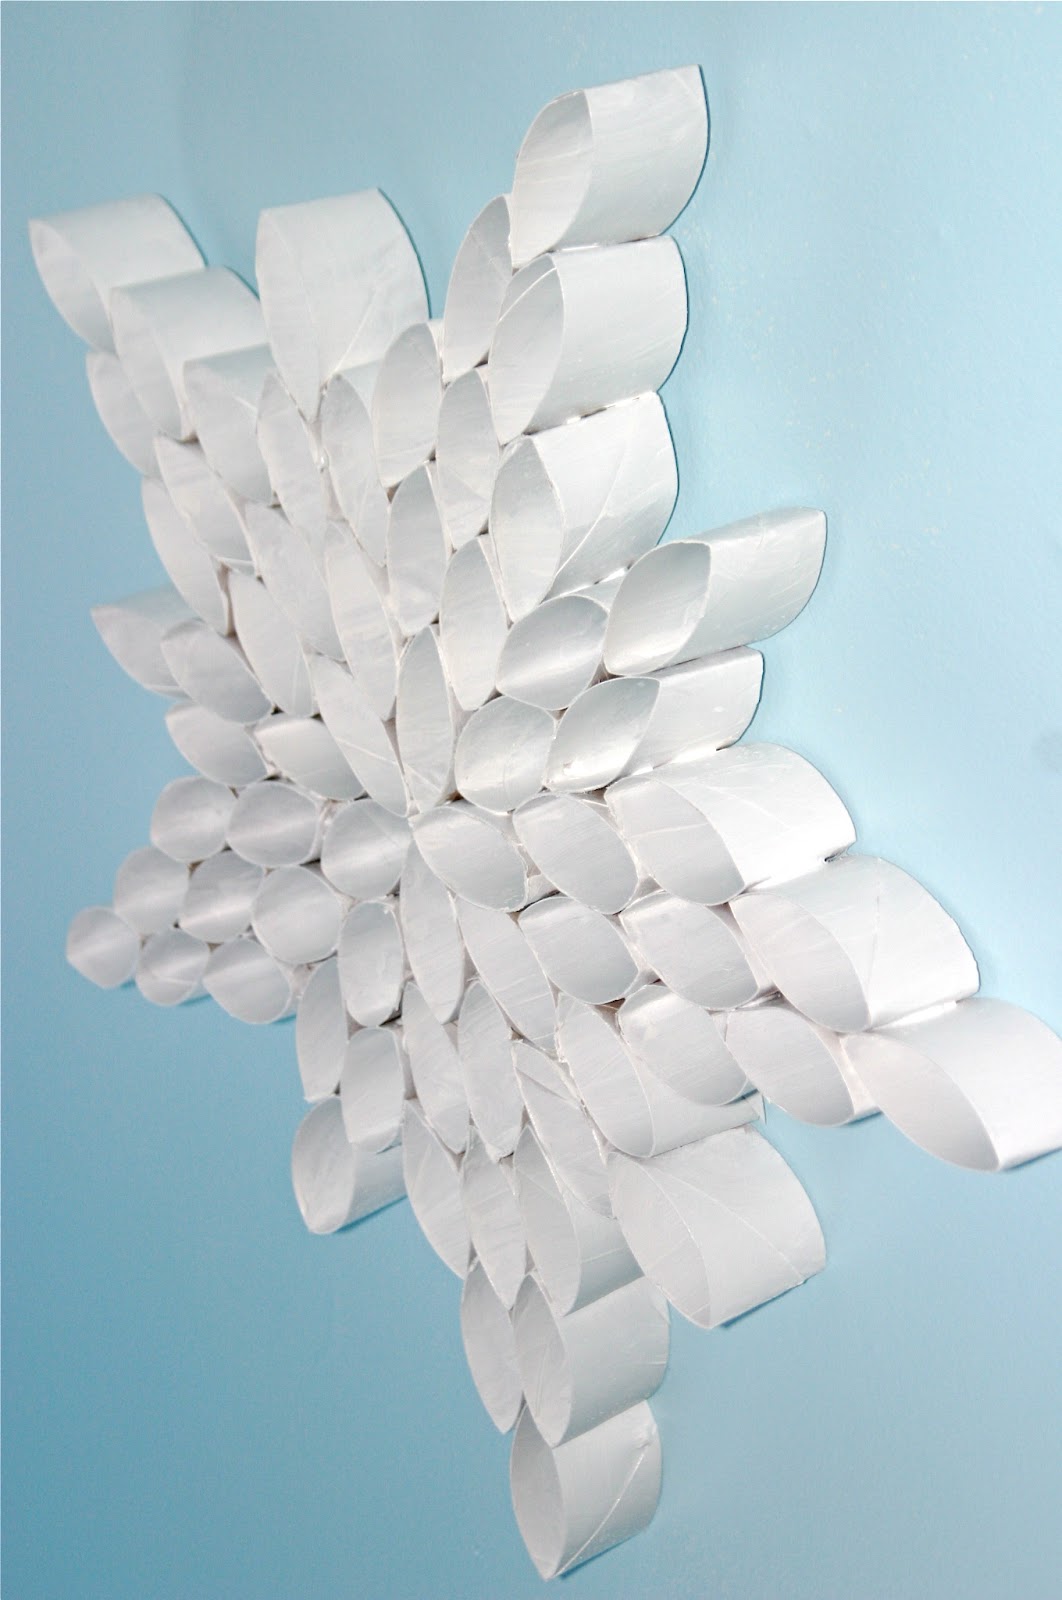
     I wanted my star to be white (to go with my bedroom colors), so once the rolls were all glued together, I attempted to spray paint them. The paint didn't turn out as white as I wanted it to be and didn't seem to be spreading as evenly as I had hoped, so I decided to hand paint every single roll with acrylic paint (talk about time consuming!). After a couple of days and when the acrylic paint was completely dried, I then went back over the whole thing with another coat of spray paint. This was the only way I could accomplish the bright white look I was going for. Here's the end result!


   I was VERY pleased at the way it turned out! A few things I wanted to mention though, if I were to do this project again, is that there were a couple of things I would have done differently. The first is I would have made the star/design bigger. It feels big once you start gluing it all together, but once I got it on the wall I realized that it really wasn't as big as I thought it was going to be. I would have continued gluing rolls until it took up more wall space. Second, I would have spray painted (or hand painted) the rolls BEFORE I glued them together. Because I painted them after they were already glued, you can see little shadows from the brown parts of the rolls where I couldn't reach with the paint brush. Painting the rolls prior to gluing would have made the finished product even brighter. 

   Anyhow, thank you Pinterest for giving me a successful project idea! Did you know that you can follow Musings in Mass on Pinterest? Just hop on over here. Happy pinning and recycled art making!

Monday, December 10, 2012

Homemade Christmas Ornaments/Recipe for Salt Dough Ornaments

   All of last week, I was chomping at the bit at work for the weekend. I couldn't wait to be home with my family! I had big plans to make homemade Christmas ornaments all weekend with my child and I wanted to get started ASAP!

   I couldn't be more pleased with the way that they turned out! Just like cards, ornaments are more special to me when I know little hands have worked hard on creating them. All I see is the beauty and goodness in something when I know it comes from a place of love!

   Anyhow, if you have any questions about the way that any of these are made, please comment your question on either the Blogger website or my Facebook page. They're very easy and pretty self-explanatory. The most important item you will need for all of them is a GLUE GUN. If you are a mom and you don't own a glue gun, you need to run to the store right now (Michael's, Jo-Ann's, Hobby Lobby, etc.) and buy yourself one! You won't regret it! The glue gun has a been a life saver for me, not only for crafts but for many other magical mom tricks such as: fixing toys, patching holes so that ants don't get into your house, fixing the soles of shoes, its uses are endless! I also used a lot of popsicle sticks. These are good to have around the house too! If you are curious about what craft supplies might be handy to have at home, please refer to my older post on Art at Home


   Another fun Christmas activity to do with your kids is making salt dough ornaments. I'm not sure how long lasting they are, but they are fun to make and decorate. If you HAVE to throw them out, at least you'll know that you didn't spend a lot of them AND you can have fun making them again next year! I've seen lots of variations of this recipe, but here's the recipe that I followed.

Salt Dough Ornaments

You will need:

2 cups flour
1 cup salt
3/4 cup warm water
Cookie cutters
Straw
Cooking spray
Paint, glitter, etc. to decorate
String


1. Preheat over to 225 degrees.
2. Mix flour and salt. Add water. Knead until soft (if dry, add more water).

3. Roll dough on floured surface to 1/4-inch thick. 

Cut with cutters. Add hole at top with straw. Put shapes on sprayed cookie sheet and bake 2 to 4 hours until hard, flipping every 45 minutes.
 4. Let cool completely. Decorate. Tie ribbon through hole.


To see my recipe for Cinnamon Cut Out Ornaments, click here.

Sources of inspiration:  http://www.usmagazine.com/celebrity-news/news/tori-spellings-kid-friendly-holiday-entertaining-tips-2012512, http://www.misseberhartsclass.com/christmas_ornaments.htm, http://www.thecraftycrow.net/2008/12/popsicle-stic-2.html.