I love challah! Being that we are a Jatholic family (Jewish-Catholic), we eat challah every Friday. We have an excellent bakery here in Northampton (Hungry Ghost Bread) that we usually get our challah from, but I was feeling ambitious over the summer and decided that I wanted to learn how to make my own.
It is surprisingly really easy! My son and I made it together and it was a fun project. The recipe came from a book we got at the library called Jewish Fairy Tale Feasts: A Literary Cookbook by Jane Yolen. She lists the ingredients in the order/amounts in which they are used. Enjoy!
Challah
Ingredients:
1/2 cup warm water
1 envelope active dry yeast (2 1/4 tsp)
1 tsp sugar
2 tbsp honey
1 tbsp vegetable oil
1 tbsp sugar
1 tsp salt
1 egg
2-2 1/2 cups all-purpose flour
vegetable oil
1 egg
cooking spray
1. Put the water, yeast, and 1 tsp sugar in the bowl of a food processor or a large bowl, and set the timer for 10 minutes. (We used a bowl and mixed everything by hand.)
2. While you wait, combine the honey, oil, 1 tbsp sugar, and salt in a small bowl, then add the egg.
3. When the timer dings, add the honey mixture to the yeast mixture.
4. Mix using the food processor (or a spoon) until blended together.
5. Pour flour into the wet mixture a little at a time, mixing in each batch before adding more. When a ball forms, add a little more flour, and mix, remembering that you don’t have to use all the flour and you can always add more.
6. Sprinkle flour on a clean counter top or a board, and remove the dough from the processor, or bowl. Knead the dough by hand on the floured surface for about ten minutes.
7. Pour a teaspoon of vegetable or any light cooking oil into the large bowl, and put the ball of dough into it. Cover the bowl with plastic wrap or a wet (but not dripping) towel, and place the bowl aside to rise. Set the timer for 90 minutes.
8. When the dough has risen for 90 minutes, take a small handful of flour and sprinkle it on the counter or board. Uncover the dough and punch it down with your fist a couple of times. Then put it on the floured surface, and pull or roll it into a fat rope.
9. Cut the dough rope into 3 equal pieces then roll and pull those pieces into thinner ropes.
10. Braid the dough (we watched a video on braiding techniques).
11. Grease the baking sheet with cooking spray and set the challah loaf on it. Cover lightly with plastic wrap, set the timer, and let it rise again for 60 minutes.
12. Heat oven to 350.
13. After 60 minutes, in a small bowl, mix a beaten egg with a little water, brush onto the top of the challah, then put the loaf in the oven to bake for 30-35 minutes (we sprinkled sesame seeds on top).
14. When the challah is done, it should be golden brown and make a hollow sound when the bottom is tapped.
A Flint girl firing shots in Western Massachusetts, trying to capture what life is like in the Pioneer Valley. Here you'll find some of my photographs, suggested places to visit, good buys, projects, recipes, and random thoughts.
Showing posts with label things for kids. Show all posts
Wednesday, February 22, 2017
Tuesday, October 21, 2014
The Ultimate Halloween Party
Last weekend, I hosted a Halloween party for eleven third graders. It was a blast! I was going to write a really lengthy post with all of the details of the party and the "how-to's" of party planning... but I decided you'd rather just look at the pictures. PLUS, I realized that I didn't snag pictures of ALL of the games, prizes and decorations (sometimes you just have to live in the moment!) so here are some of the highlights of the Ultimate Halloween Party.
When the children first arrived, I had three main areas for them to wander between. The first was a Zombie Warrior Training Zone.
I set up some bales of hay and tied on balloons with Zombie faces drawn on them. I had a pile of sticks set next to the hay for the kids to pop the Zombies with and sharpen their swordsmanship.
Then I had a Can Knockdown game set up for the kids to test their strength.
This game was a lot of fun to make! I recycled my cans and painted them as pumpkins, ghosts, black cats, Frankenstein's monster, and a mummy.
I also had a Craft Table set up.
The Craft Table had three stations. At the first, the kids could decorate their treat bag with Halloween stickers, stamps, and markers. At the second, I had a Halloween Cootie Catcher (which I found here: http://catchmyparty.com/blog/free-halloween-party-printables-from-b-nute-productions) printed and cut out, ready for the kids to fold. The third was Halloween tattoos. Unfortunately, it was really windy the day of the party so I had to use rocks to hold everything down, but we managed to make it work.
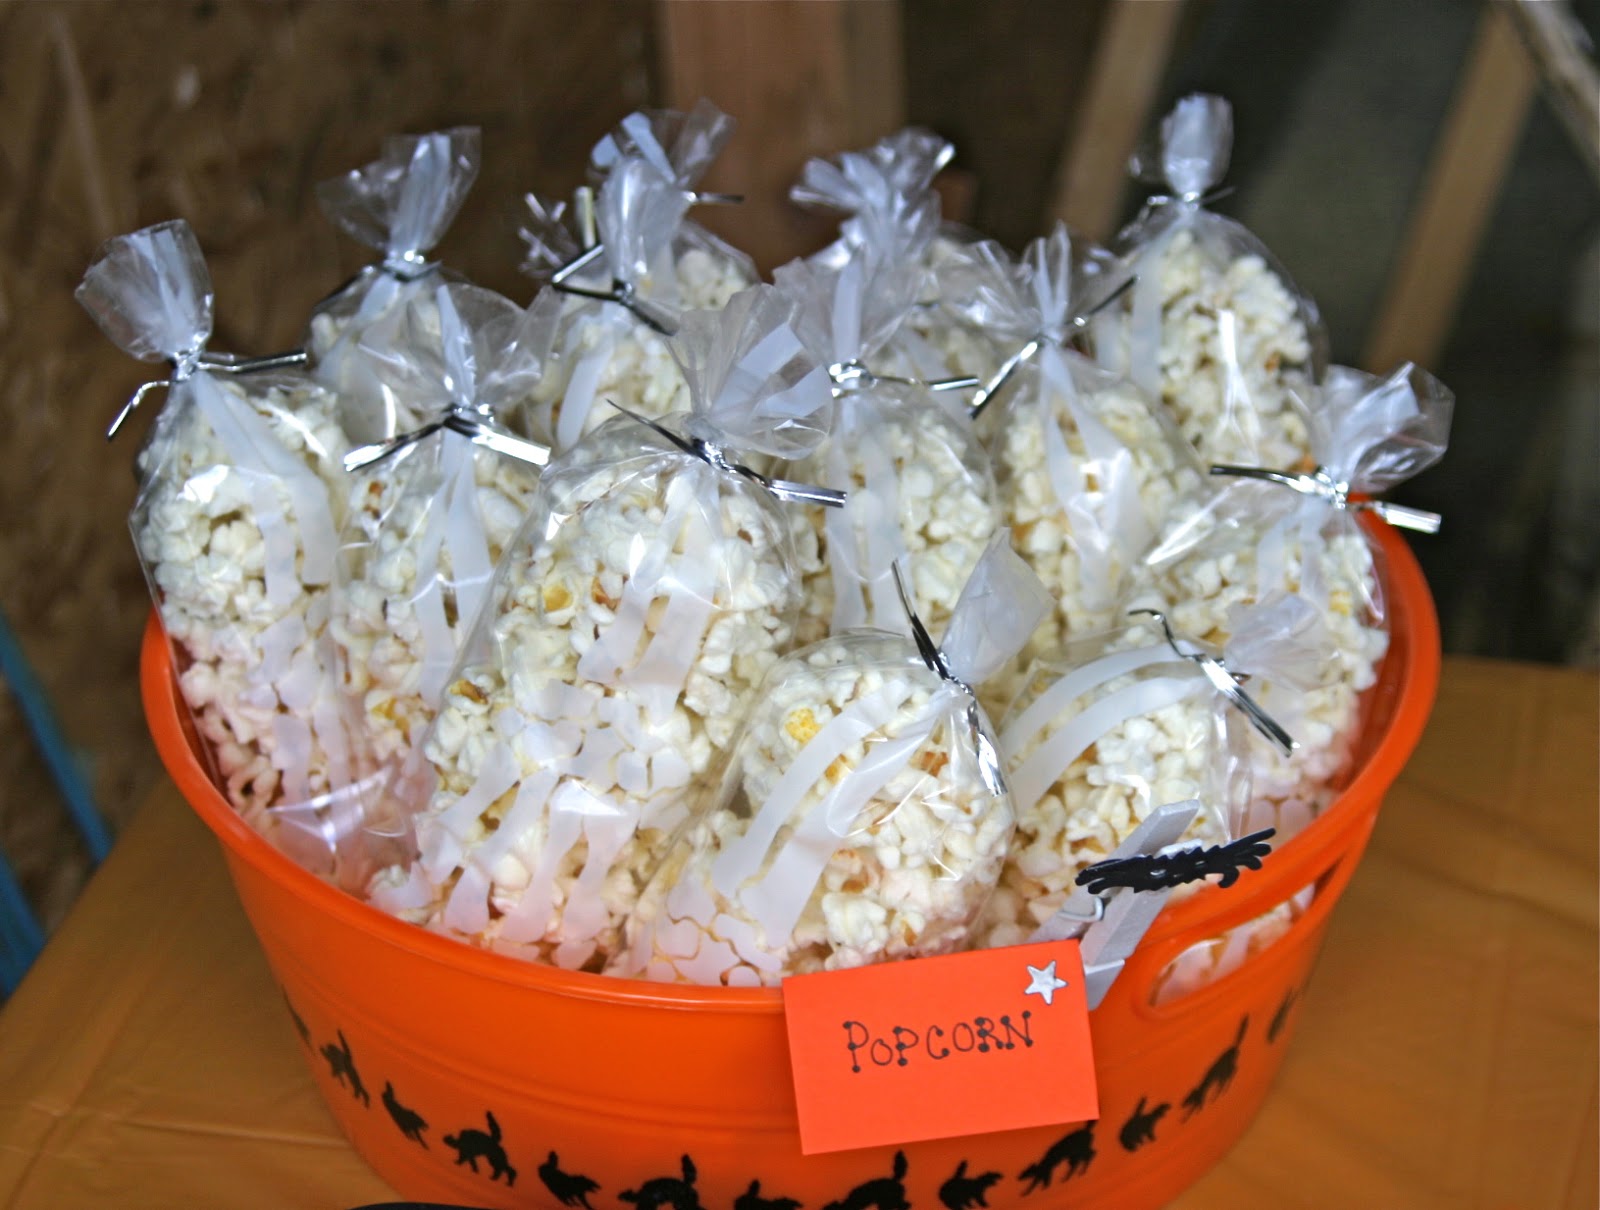
Last, I had the Food Table. I tried to have a variety of snacks, all with a Halloween twist!
The Autumn Mix consisted of pretzel sticks, Chex corn cereal, Count Chocula cereal, M&M's, and a candy corn mix (with the pumpkins).
The spiders were made from peanut butter (I made sure there were no peanut allergies at the party), Ritz crackers, pretzel sticks, and chocolate chips.
For the first half hour of the party, I let the kids roam between the three areas. As I suspected, the boys spent most of their time in the Zombie Warrior Training Area (and running around) and the girls stayed closer to the Craft and Food Tables, but all of the kids did go back and forth between all of the areas. Once everyone had arrived and had a chance to run around, we started the games!
The first game is what I like to call the Pumpkin/Bozo/Grand Prize Game. Did you ever watch “The Bozo Show” when you were little? (Fun Fact: Bob Bell aka “Bozo the Clown” was a fellow Flint native.) Towards the end of the show, Bozo would pick a child to play the “Grand Prize Game” (If you aren’t familiar with it, you can watch a clip of it here: http://www.youtube.com/watch?v=B9IMebdCT6s). The game consisted of five buckets in a row and each bucket was associated with different prizes, getting bigger and better with each further bucket. The child would stand in front of the row of buckets and had to throw a ping pong ball into each bucket in order to get the prize associated with it. This game was similar to the Grand Prize Game, but with a Halloween twist.
I spray painted a long board black and screwed 5 plastic pumpkins into the board in a row.
I drew a chalk line on the cement where the kids were supposed to stand and had them line up behind it. I had 5 different prize buckets and let them choose prizes from each bucket that they were able to throw the ball into.
The game worked well, but I would recommend using a small bean bag instead of the ping pong ball. The ping pong ball made the game a little too difficult for this age group.
The next game we played was Poke-A-Pumpkin. I've done a pinata for years (see my tutorial on how to make a pinata here) and have gotten tired of doing the same thing over and over again. I started searching Pinterest for an alternative to a pinata and found this gem. To make the game, I took an old canvas (you could easily use a foam board) and spray painted it black. I then hot glued orange cups onto the canvas. I then put different prizes and candy into each cup and covered it with tissue paper and a rubber band. The kids lined up and took turns poking a cup and taking the prize inside.
I wasn't sure how this game would go over with this age group because the game was so simple, but the kids loved it and I had enough cups for them to each go twice. Although the hot glue worked out alright, I would recommend using Epoxy glue. I think it would hold better.
The next game we played was the Wrap-A-Mummy game. I had the kids get into teams of two. We happened to have eleven kids at the party, so we made one of the teams have three kids. I then had them decide who the "Mummy" was going to be. I gave them a roll of toilet paper and told them that the first team to most carefully cover/wrap their mummy the fastest would win.
The kids did a great job with this game! I thought for sure that they would be running around each other throwing the toilet paper all over the other kid, but they were all very careful and took their time wrapping their mummy.
We also played two other really fun games but sadly, I didn't get any pictures of those games. Perhaps I'll save them for next year and tell you all about them then!
All of the kids appeared to have a really great time and I had a great time hosting!
As always, thanks for reading and let me know if you end up having your own Ultimate Halloween Party!
When the children first arrived, I had three main areas for them to wander between. The first was a Zombie Warrior Training Zone.
I set up some bales of hay and tied on balloons with Zombie faces drawn on them. I had a pile of sticks set next to the hay for the kids to pop the Zombies with and sharpen their swordsmanship.
Then I had a Can Knockdown game set up for the kids to test their strength.
This game was a lot of fun to make! I recycled my cans and painted them as pumpkins, ghosts, black cats, Frankenstein's monster, and a mummy.
I also had a Craft Table set up.
The Craft Table had three stations. At the first, the kids could decorate their treat bag with Halloween stickers, stamps, and markers. At the second, I had a Halloween Cootie Catcher (which I found here: http://catchmyparty.com/blog/free-halloween-party-printables-from-b-nute-productions) printed and cut out, ready for the kids to fold. The third was Halloween tattoos. Unfortunately, it was really windy the day of the party so I had to use rocks to hold everything down, but we managed to make it work.
Last, I had the Food Table. I tried to have a variety of snacks, all with a Halloween twist!
The Autumn Mix consisted of pretzel sticks, Chex corn cereal, Count Chocula cereal, M&M's, and a candy corn mix (with the pumpkins).
The spiders were made from peanut butter (I made sure there were no peanut allergies at the party), Ritz crackers, pretzel sticks, and chocolate chips.
For the first half hour of the party, I let the kids roam between the three areas. As I suspected, the boys spent most of their time in the Zombie Warrior Training Area (and running around) and the girls stayed closer to the Craft and Food Tables, but all of the kids did go back and forth between all of the areas. Once everyone had arrived and had a chance to run around, we started the games!
The first game is what I like to call the Pumpkin/Bozo/Grand Prize Game. Did you ever watch “The Bozo Show” when you were little? (Fun Fact: Bob Bell aka “Bozo the Clown” was a fellow Flint native.) Towards the end of the show, Bozo would pick a child to play the “Grand Prize Game” (If you aren’t familiar with it, you can watch a clip of it here: http://www.youtube.com/watch?v=B9IMebdCT6s). The game consisted of five buckets in a row and each bucket was associated with different prizes, getting bigger and better with each further bucket. The child would stand in front of the row of buckets and had to throw a ping pong ball into each bucket in order to get the prize associated with it. This game was similar to the Grand Prize Game, but with a Halloween twist.
I spray painted a long board black and screwed 5 plastic pumpkins into the board in a row.
I drew a chalk line on the cement where the kids were supposed to stand and had them line up behind it. I had 5 different prize buckets and let them choose prizes from each bucket that they were able to throw the ball into.
The game worked well, but I would recommend using a small bean bag instead of the ping pong ball. The ping pong ball made the game a little too difficult for this age group.
The next game we played was Poke-A-Pumpkin. I've done a pinata for years (see my tutorial on how to make a pinata here) and have gotten tired of doing the same thing over and over again. I started searching Pinterest for an alternative to a pinata and found this gem. To make the game, I took an old canvas (you could easily use a foam board) and spray painted it black. I then hot glued orange cups onto the canvas. I then put different prizes and candy into each cup and covered it with tissue paper and a rubber band. The kids lined up and took turns poking a cup and taking the prize inside.
I wasn't sure how this game would go over with this age group because the game was so simple, but the kids loved it and I had enough cups for them to each go twice. Although the hot glue worked out alright, I would recommend using Epoxy glue. I think it would hold better.
The next game we played was the Wrap-A-Mummy game. I had the kids get into teams of two. We happened to have eleven kids at the party, so we made one of the teams have three kids. I then had them decide who the "Mummy" was going to be. I gave them a roll of toilet paper and told them that the first team to most carefully cover/wrap their mummy the fastest would win.
The kids did a great job with this game! I thought for sure that they would be running around each other throwing the toilet paper all over the other kid, but they were all very careful and took their time wrapping their mummy.
We also played two other really fun games but sadly, I didn't get any pictures of those games. Perhaps I'll save them for next year and tell you all about them then!
All of the kids appeared to have a really great time and I had a great time hosting!
As always, thanks for reading and let me know if you end up having your own Ultimate Halloween Party!
Tuesday, July 15, 2014
Puffer's Pond
I first heard about Puffer’s Pond in Amherst back in 2008. Some friends of mine had taken their children swimming there and told me that it was a very popular swimming hole in the Amherst area. I never had a chance to visit it (mostly because I’m never really out in that area on the weekends) but was still curious about it all of these years later.
I finally got around to visiting it last week with a friend of mine who had been there before. There is no fee to enter the pond and the entrance we used only had a little tiny sign and looked like this:
(I say “the entrance we used” because I am assuming that there are multiple entrances, but we couldn’t find where the other entrances were.)
We parked the car and walked up to a large grassy area where (mostly) college students were laying in the sun. There were trails going along both the left and right of the pond, however, I didn’t wear appropriate shoes for the trip so we didn’t walk very far.
The part of the pond that we happened to be at had no beach, just a little ledge. The water below looked to be about 3 feet deep and had some people walking around in it. We could see a small beach across the pond but we could NOT figure out how to get to it!!
After doing some research online, I found an article from the Daily Hampshire Gazette that state that the pond is slated to have $36K in renovations this year. It also read,
“Other people who use the pond’s two beaches and nearby walking trails may notice that the wooden cribbing, used to hold sand in place and stabilize the pathways, are sagging.”
Clearly, there were two beaches somewhere but we had no idea how to find them. I don’t feel as though I can give a fair review of this well-known swimming hole because I feel like there are many parts of it I didn’t get a chance to see. Perhaps I’ll take another adventure out there soon. Until then, enjoy a couple of images from my trip.
To learn more about Puffer’s Pond, visit: http://www.amherstma.gov/index.aspx?NID=1316.
I finally got around to visiting it last week with a friend of mine who had been there before. There is no fee to enter the pond and the entrance we used only had a little tiny sign and looked like this:
(I say “the entrance we used” because I am assuming that there are multiple entrances, but we couldn’t find where the other entrances were.)
We parked the car and walked up to a large grassy area where (mostly) college students were laying in the sun. There were trails going along both the left and right of the pond, however, I didn’t wear appropriate shoes for the trip so we didn’t walk very far.
The part of the pond that we happened to be at had no beach, just a little ledge. The water below looked to be about 3 feet deep and had some people walking around in it. We could see a small beach across the pond but we could NOT figure out how to get to it!!
After doing some research online, I found an article from the Daily Hampshire Gazette that state that the pond is slated to have $36K in renovations this year. It also read,
“Other people who use the pond’s two beaches and nearby walking trails may notice that the wooden cribbing, used to hold sand in place and stabilize the pathways, are sagging.”
Clearly, there were two beaches somewhere but we had no idea how to find them. I don’t feel as though I can give a fair review of this well-known swimming hole because I feel like there are many parts of it I didn’t get a chance to see. Perhaps I’ll take another adventure out there soon. Until then, enjoy a couple of images from my trip.
To learn more about Puffer’s Pond, visit: http://www.amherstma.gov/index.aspx?NID=1316.
Labels:
Amherst,
Beach,
Hiking,
parks,
Places to Go,
swimming,
things for kids
Sunday, March 16, 2014
St. Patrick's Day Chocolate Mint Cookie Bark
I stumbled across this yummy recipe for chocolate mint cookie bark and thought it would be fun to make with my son. We always bake something festive together for St. Patrick's Day and this recipe combined all of my favorite things! It's a great recipe to involve your child in because of all of the little jobs you can give them while you're melting the chocolate (like sorting the M & M's, crushing the Oreos, etc.). I hope you'll enjoy it!
St. Patrick's Day Chocolate Mint Cookie Bark
Ingredients
• 12 ounces semi-sweet or milk chocolate chips
• 12 ounces white chocolate chips
• 2 tablespoons vegetable shortening (like Crisco), divided
• 20 chocolate sandwich cookies (I used regular Oreos)
• 1 cup Andes mints broken into bits
• 1 cup green M&Ms (I used regular)
• Green sprinkles
1. Line a large jellyroll pan or cookie sheet with wax paper. Roughly chop sandwich cookies into quarters.
2. Pour semi-sweet chocolate chips and 1 tablespoon shortening into a microwave-safe bowl. Microwave for 1 minute; stir chocolate well. Microwave for another 30 seconds; stir until chocolate is smooth. (If necessary, microwave in additional 15-second increments, stirring between each one, until chocolate is completely melted and smooth.)
3. Spread melted chocolate in a thin layer onto wax paper. Sprinkle with chopped cookies and Andes pieces, pressing them down into melted chocolate in a single layer.
4. Melt white chocolate chips with 1 tablespoon shortening in a clean bowl by repeating the above process, but microwave for only 15 seconds after the initial 1 minute since white chocolate melts more quickly than regular chocolate.
5. Carefully drizzle white chocolate over cookie layer and spread in an even layer. Sprinkle with M&Ms, pressing them down into the white chocolate, and then fill in any bare areas with green sprinkles.
6. Refrigerate until chocolate is hard. Carefully break into large chunks and enjoy!
St. Patrick's Day Chocolate Mint Cookie Bark
Ingredients
• 12 ounces semi-sweet or milk chocolate chips
• 12 ounces white chocolate chips
• 2 tablespoons vegetable shortening (like Crisco), divided
• 20 chocolate sandwich cookies (I used regular Oreos)
• 1 cup Andes mints broken into bits
• 1 cup green M&Ms (I used regular)
• Green sprinkles
1. Line a large jellyroll pan or cookie sheet with wax paper. Roughly chop sandwich cookies into quarters.
2. Pour semi-sweet chocolate chips and 1 tablespoon shortening into a microwave-safe bowl. Microwave for 1 minute; stir chocolate well. Microwave for another 30 seconds; stir until chocolate is smooth. (If necessary, microwave in additional 15-second increments, stirring between each one, until chocolate is completely melted and smooth.)
3. Spread melted chocolate in a thin layer onto wax paper. Sprinkle with chopped cookies and Andes pieces, pressing them down into melted chocolate in a single layer.
4. Melt white chocolate chips with 1 tablespoon shortening in a clean bowl by repeating the above process, but microwave for only 15 seconds after the initial 1 minute since white chocolate melts more quickly than regular chocolate.
5. Carefully drizzle white chocolate over cookie layer and spread in an even layer. Sprinkle with M&Ms, pressing them down into the white chocolate, and then fill in any bare areas with green sprinkles.
6. Refrigerate until chocolate is hard. Carefully break into large chunks and enjoy!
| Everything ready to go in the refrigerator! |
| Once the bark has cooled, break it apart into pieces. |
| We put some in a little bag and attached the recipe as a gift for my son's teacher. |
Saturday, January 11, 2014
Lego Party
We decided to throw a birthday party for my son and his cousins while visiting our home state of Michigan this year. Seeing as how we were traveling, we weren't going to do anything big and crazy, so my sister graciously offered to host a "home" birthday party at her house. I let my son pick whatever theme he wanted and this year he chose a Lego themed birthday party. When I went to the local party store to check out what kind of decorations were available in that theme however, I was disappointed with my options. So what did I do? I logged on to good ol' Pinterest for inspiration!
The first thing I wanted to tackle were the goody bags. I had decided that in each bag I would put a small Lego set (like the kind you see by the cash register at Target) and a small bag of Lego brick candy that they sell at my local bulk candy store. I already had some clear plastic candy bags, so I purchased a large bag of the brick candy and divided it up. I scooped some of the bricks into each bag and weighed them with a food scale that we had to make sure that each bag had the same amount of candy.
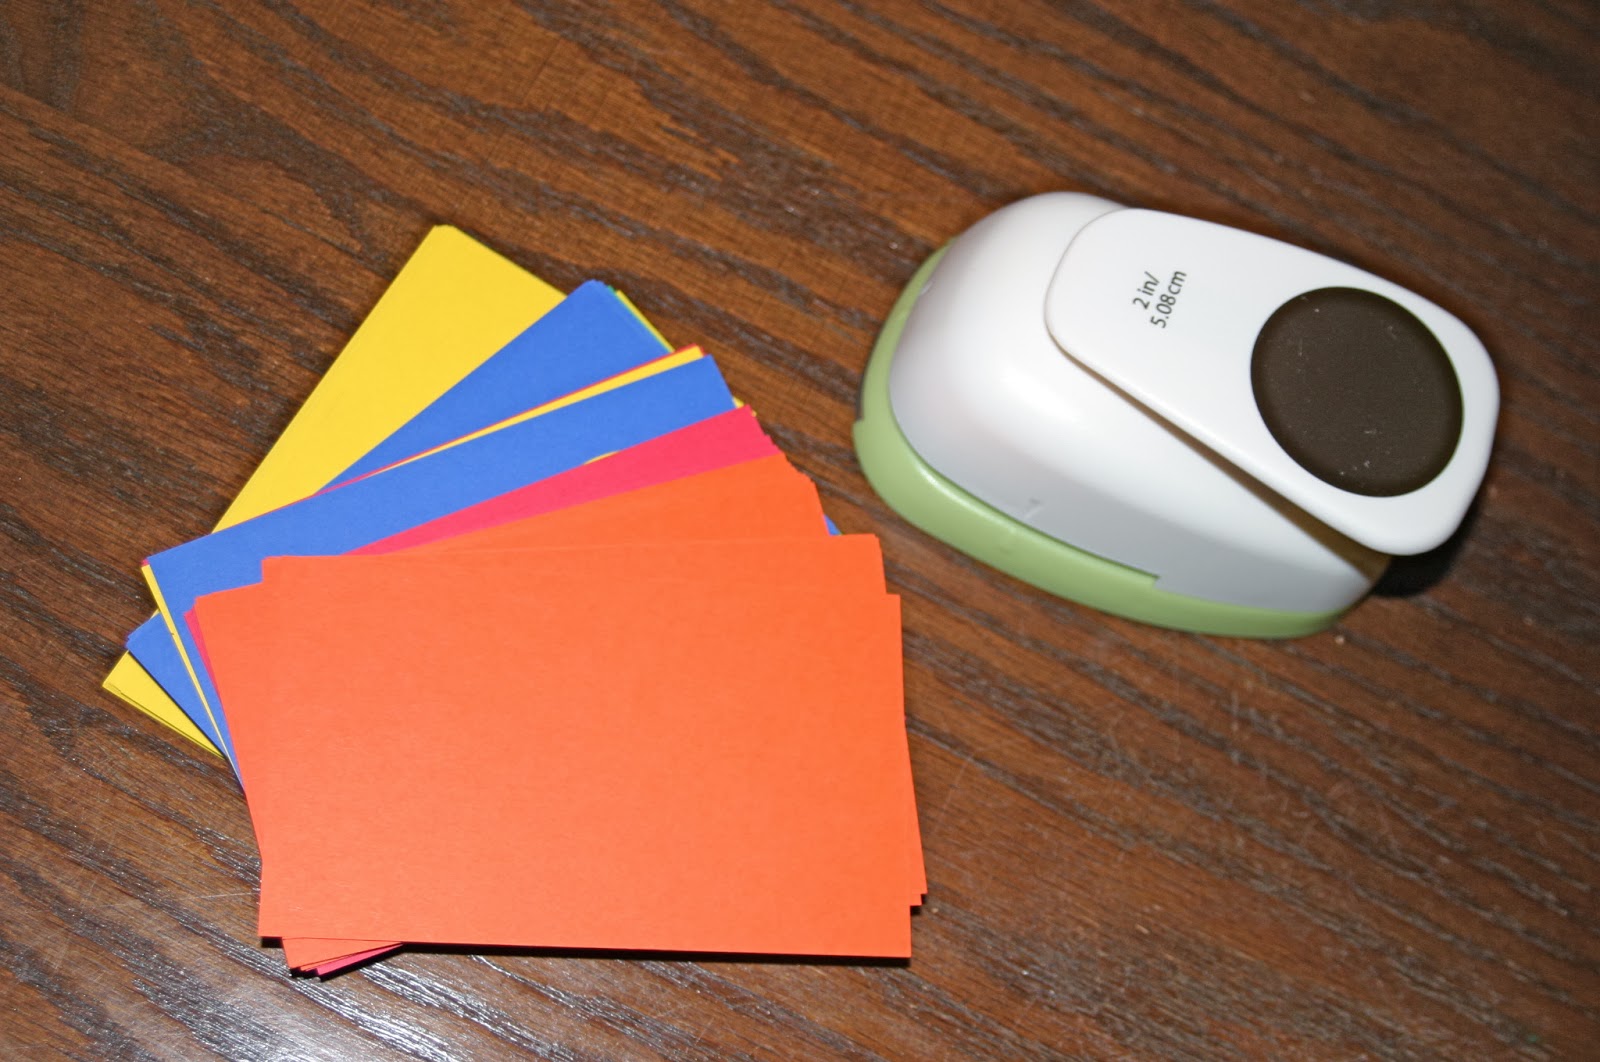
To make the bags, I purchased some paper bags with handles from Michael's, a package of card stock that matched each bag, a 2 inch hole punch and some double-sided foam mounting tape.
I punched the holes out of the card stock and attached them to each bag with the mounting tape, measuring with a rule to make sure that the circles were roughly an equal distance from each other. The result was a Lego brick looking bag.
For the decorations, I purchased square plates from Target, and napkins, cups, plastic tablecloths, balloons and streamers in the same colors as the bags (red, blue, green, yellow, orange) from the Dollar Tree (my favorite place for party supplies!). I happened to already have a "Happy Birthday" banner from last year so I used that as well. I put everything out on the table and scattered Lego pieces down the middle of the table. To create the Lego figure guys that I put on the windows and in various locations around the house, I Googled "Lego Coloring Page" and found a template that I copied into a Word document and then printed onto yellow paper. I then cut each guy out (in stacks of 3-4 at a time) and taped him around the house.
I wanted to keep the party simple, so I only arranged for two games. The first one was "Guess how many Lego pieces are in the jar?" I had my sister put Lego bricks into a jar and count them so that we would know how many were in there. Each child took a turn guessing how many bricks were in the jar by writing their name and number on a piece of paper. The child with the closest number without going over was the winner. The second game we played was "See how many Lego bricks you can move with chop sticks in one minute." I put out two plates, one with Lego pieces and an empty plate. I then gave the child a set of chop sticks and made them put their other hand behind their back. They had one minute to see how many Lego pieces they could move over to the other plate with the chop sticks (I timed them with my phone). The game was a lot of fun for all of the different ages we had at the party (ages 5-11) and it was interesting to see the strategy each child used to move the pieces. The kids all seemed to have a great time!
For the cake, I ordered a "Lego brick cake" at a local bakery. I wasn't sure what I would end up with, but I thought they did a good job. I then purchased a small Lego set for the top and Lego brick candles from Target. I was happy with the end result.
The small party was very easy to throw together and my son was very happy with the results. Overall, I think the way that I decided to create the decorations was significantly cheaper than if I would have purchased the Lego themed party supplies from the party store. The most expensive part of the party was the goody bags, but I thought they were worth it! What kinds of things did you do at your Lego party? Let me know!
The first thing I wanted to tackle were the goody bags. I had decided that in each bag I would put a small Lego set (like the kind you see by the cash register at Target) and a small bag of Lego brick candy that they sell at my local bulk candy store. I already had some clear plastic candy bags, so I purchased a large bag of the brick candy and divided it up. I scooped some of the bricks into each bag and weighed them with a food scale that we had to make sure that each bag had the same amount of candy.
To make the bags, I purchased some paper bags with handles from Michael's, a package of card stock that matched each bag, a 2 inch hole punch and some double-sided foam mounting tape.
I punched the holes out of the card stock and attached them to each bag with the mounting tape, measuring with a rule to make sure that the circles were roughly an equal distance from each other. The result was a Lego brick looking bag.
For the decorations, I purchased square plates from Target, and napkins, cups, plastic tablecloths, balloons and streamers in the same colors as the bags (red, blue, green, yellow, orange) from the Dollar Tree (my favorite place for party supplies!). I happened to already have a "Happy Birthday" banner from last year so I used that as well. I put everything out on the table and scattered Lego pieces down the middle of the table. To create the Lego figure guys that I put on the windows and in various locations around the house, I Googled "Lego Coloring Page" and found a template that I copied into a Word document and then printed onto yellow paper. I then cut each guy out (in stacks of 3-4 at a time) and taped him around the house.
I wanted to keep the party simple, so I only arranged for two games. The first one was "Guess how many Lego pieces are in the jar?" I had my sister put Lego bricks into a jar and count them so that we would know how many were in there. Each child took a turn guessing how many bricks were in the jar by writing their name and number on a piece of paper. The child with the closest number without going over was the winner. The second game we played was "See how many Lego bricks you can move with chop sticks in one minute." I put out two plates, one with Lego pieces and an empty plate. I then gave the child a set of chop sticks and made them put their other hand behind their back. They had one minute to see how many Lego pieces they could move over to the other plate with the chop sticks (I timed them with my phone). The game was a lot of fun for all of the different ages we had at the party (ages 5-11) and it was interesting to see the strategy each child used to move the pieces. The kids all seemed to have a great time!
The small party was very easy to throw together and my son was very happy with the results. Overall, I think the way that I decided to create the decorations was significantly cheaper than if I would have purchased the Lego themed party supplies from the party store. The most expensive part of the party was the goody bags, but I thought they were worth it! What kinds of things did you do at your Lego party? Let me know!
Tuesday, November 19, 2013
Cinnamon Cut Out Ornaments
One of my favorite things to do with my son during the holiday season is to make homemade ornaments for the tree. They're fun, creative, and make great gifts! If you haven't seen my other post about homemade salt dough ornaments, you can find it by clicking here. Cinnamon Cut Out Ornaments are one of my favorite kinds of ornaments to make because they're really easy to make, smell delicious and look adorable. Enjoy!
1 Cup Ground Cinnamon
2/3 Cup Applesauce
1 Tbs White Glue
1. Mix all of the ingredients (the cinnamon, applesauce and glue) together.
3. Turn over frequently for the next 2-3 days. Let them dry completely.
4. Once completely dry, you can decorate with fabric paints or glitter glue, or just leave them as they are!
Don't forget to share with someone you love!
Cinnamon Cut Out Ornaments
(For decoration only! DO NOT EAT!)
1 Cup Ground Cinnamon
2/3 Cup Applesauce
1 Tbs White Glue
1. Mix all of the ingredients (the cinnamon, applesauce and glue) together.
2. Roll out to about 1/4 inch thick on a surface sprinkled with extra cinnamon. Cut shapes with cookie cutters and lay flat on wax paper. Use a straw to make a hole at the top for the string.
3. Turn over frequently for the next 2-3 days. Let them dry completely.
4. Once completely dry, you can decorate with fabric paints or glitter glue, or just leave them as they are!
Don't forget to share with someone you love!
Tuesday, October 22, 2013
Hot Mummies
This is a fun, festive Halloween meal I saw on Pinterest a few weeks ago and was very excited to make for my son (he's very into zombies and mummies right now). It was super easy and turned out great!
Hot Mummies (or Mummy Dogs)
Preheat the oven to 375.
You'll need:
Hot Dogs
One can of crescent dough
1. Slice the hot dogs using 3 cuts to look like little people (see picture).
2. Unroll the can of dough. With a knife, cut each rectangle lengthwise, into 7-10 long pieces.
3. Wrap the strips of dough around each hot dog to look like "bandages," stretching dough slightly to completely cover hot dog. About 1/2 inch from one end of each hot dog, separate "bandages" so hot dog shows through for the "face."
4. On ungreased large cookie sheet, place wrapped hot dogs; spray dough lightly with cooking spray.
5. Bake 13 to 17 minutes or until dough is light golden brown and hot dogs are hot. With mustard, draw features on "face" (I didn't do this part because we don't care for mustard).
Hot Mummies (or Mummy Dogs)
Preheat the oven to 375.
You'll need:
Hot Dogs
One can of crescent dough
1. Slice the hot dogs using 3 cuts to look like little people (see picture).
2. Unroll the can of dough. With a knife, cut each rectangle lengthwise, into 7-10 long pieces.
3. Wrap the strips of dough around each hot dog to look like "bandages," stretching dough slightly to completely cover hot dog. About 1/2 inch from one end of each hot dog, separate "bandages" so hot dog shows through for the "face."
4. On ungreased large cookie sheet, place wrapped hot dogs; spray dough lightly with cooking spray.
5. Bake 13 to 17 minutes or until dough is light golden brown and hot dogs are hot. With mustard, draw features on "face" (I didn't do this part because we don't care for mustard).
Tuesday, July 23, 2013
Monument Mountain & South Street Package and Variety (Another Secret Spot for Great Indian Food!)
My family recently hiked on Monument Mountain in Great Barrington. We’ve been doing the same hike for awhile and decided to change things up. This was a refreshing new hike for us!
We started out by taking the Indian Monument Trail. According to the brochure/map, it was “the most gradual, providing walkers with a leisurely ascent up a former carriage road.” You start on a path that runs along the side of the road where you can hear the cars buzzing by and you stay on that for quite a while. Then, you head directly through the woods, which was an easy path to take, but there wasn’t much to look at. The path was very straightforward and gradual, but I struggled with how boring it was. It made it seem longer. We took this path because we had our son with us and we weren’t sure of how difficult each path would get.
Once we got near the top, there were some rocks that appear to have been chipped away at/formed to serve as steps.
At the top, there were some large rocks that we could rest on to have a snack and enjoy the view. To get the best view for picture taking however, you have to climb on top of the rocks, which can be nerve-wracking for those who have children with them or who have a fear of heights. I wouldn’t say it’s the most kid friendly mountaintop I’ve ever been on. There are some steep cliffs and dangerous edges! But the view was beautiful!
On our way down, we decided to take the Hickey Trail. This trail was a lot more fun!There were several log bridges that you had to cross (that weren’t too far off the ground) and a cave with a tiny stream of water pouring over the edge of it. We all found this path to be far more enjoyable.
There was also a third trail, the Squaw Peak Trail, that was supposed to have the best views, but we didn’t attempt it because the map said it ran along the top of steep cliffs and that sounded a little too risky to do with a child. If you’ve done this trail or know anything about it, write me and let me know! I’d like to know if it would be appropriate for children.
Overall, my family had a great experience. If we go back, we will skip taking the Indian Monument Trail the whole way up and take one of the other trails. They seemed to have more interesting things to look at. I need a little bit of excitement while I’m hiking!
A few points I wanted to make:
- I would say this hike is probably best for kids 6 and up. I think younger kids are capable of doing the hike, but I would worry about where they’ll want to explore once they get to the top. Keep a close eye on them!
- There are no bathrooms or portable toilets, so make sure you use the bathroom before you arrive to the trails.
- Bring your bug spray! Once you’re going directly through the woods, the gnats and mosquitos can get a little crazy around your head.
- It states this in the map but I want to make a point of restating it, please keep your dogs on their leashes. We went past several people who did NOT have their dogs on leashes and this makes the hike more uncomfortable for other people, especially when you have children with you. Dogs are curious creatures and that doesn’t go away just because they’re on a hike! Several of the dogs we passed tried to approach us (and it wasn’t always in a playful manner) and it was a little scary. You never know when animals may decide to act out. Just keep them away from other hikers, it’s courteous.
One of the most exciting parts of our hiking adventure though wasn’t the hike. It was this:
South Street Package and Variety near the corner of 143 and 8 (South Street) in Hinsdale. I know, it doesn’t look like much, but this caught our eyes as we were driving by:
Any hole-in-the-wall Indian place that is buried in the hilltowns is worth a try for us! Most people probably wouldn’t even think to stop and try it, but we LOVE hidden finds like this!
When you go in, it looks like a typical package store (that’s a convenience store for you Michigan folks!) but there’s a little dining spot in the back. Nothing fancy, but details like that aren’t important when you’re passionate about good Indian food!
The owners were a very nice family from New Delhi, India. We chatted with the husband for awhile while his wife cooked our order. It’s always fascinating to learn about other people and what brought them to Western Massachusetts! I just love meeting new people!
We ordered the Chicken Saag, Chana Masala, Chicken Tikka, Pratatha, and Raita and they were all DELICIOUS! We especially liked the Chicken Saag and Chana Masala! We practically inhaled it! Even my son loved the Chicken Saag and he normally won’t go anywhere near anything with green in it!
The food was great and very reasonably priced. We will DEFINITELY be dining there again. If you are ever in the Hinsdale area and LOVE and appreciate good Indian food, please support this business.
A final thing I wanted to add...
Please know that I do not make any money from this blog and get nothing for free. I am not asked to visit or review any of the places that I write about. I do this strictly for fun and as a way to catalogue my family’s adventures. Hopefully, it will inspire you to visit and support some of these businesses though and go on some adventures of your own. Thank you for reading and thank you for supporting local businesses!
To read a little history about Monument Mountain, go to: http://en.wikipedia.org/wiki/Monument_Mountain_%28reservation%29. To read more reviews of the Monument Mountain hike, go to: http://www.tripadvisor.com/Attraction_Review-g41586-d2008981-Reviews-Monument_Mountain-Great_Barrington_Massachusetts.html.
We started out by taking the Indian Monument Trail. According to the brochure/map, it was “the most gradual, providing walkers with a leisurely ascent up a former carriage road.” You start on a path that runs along the side of the road where you can hear the cars buzzing by and you stay on that for quite a while. Then, you head directly through the woods, which was an easy path to take, but there wasn’t much to look at. The path was very straightforward and gradual, but I struggled with how boring it was. It made it seem longer. We took this path because we had our son with us and we weren’t sure of how difficult each path would get.
Once we got near the top, there were some rocks that appear to have been chipped away at/formed to serve as steps.
At the top, there were some large rocks that we could rest on to have a snack and enjoy the view. To get the best view for picture taking however, you have to climb on top of the rocks, which can be nerve-wracking for those who have children with them or who have a fear of heights. I wouldn’t say it’s the most kid friendly mountaintop I’ve ever been on. There are some steep cliffs and dangerous edges! But the view was beautiful!
On our way down, we decided to take the Hickey Trail. This trail was a lot more fun!There were several log bridges that you had to cross (that weren’t too far off the ground) and a cave with a tiny stream of water pouring over the edge of it. We all found this path to be far more enjoyable.
There was also a third trail, the Squaw Peak Trail, that was supposed to have the best views, but we didn’t attempt it because the map said it ran along the top of steep cliffs and that sounded a little too risky to do with a child. If you’ve done this trail or know anything about it, write me and let me know! I’d like to know if it would be appropriate for children.
Overall, my family had a great experience. If we go back, we will skip taking the Indian Monument Trail the whole way up and take one of the other trails. They seemed to have more interesting things to look at. I need a little bit of excitement while I’m hiking!
A few points I wanted to make:
- I would say this hike is probably best for kids 6 and up. I think younger kids are capable of doing the hike, but I would worry about where they’ll want to explore once they get to the top. Keep a close eye on them!
- There are no bathrooms or portable toilets, so make sure you use the bathroom before you arrive to the trails.
- Bring your bug spray! Once you’re going directly through the woods, the gnats and mosquitos can get a little crazy around your head.
- It states this in the map but I want to make a point of restating it, please keep your dogs on their leashes. We went past several people who did NOT have their dogs on leashes and this makes the hike more uncomfortable for other people, especially when you have children with you. Dogs are curious creatures and that doesn’t go away just because they’re on a hike! Several of the dogs we passed tried to approach us (and it wasn’t always in a playful manner) and it was a little scary. You never know when animals may decide to act out. Just keep them away from other hikers, it’s courteous.
One of the most exciting parts of our hiking adventure though wasn’t the hike. It was this:
South Street Package and Variety near the corner of 143 and 8 (South Street) in Hinsdale. I know, it doesn’t look like much, but this caught our eyes as we were driving by:
Any hole-in-the-wall Indian place that is buried in the hilltowns is worth a try for us! Most people probably wouldn’t even think to stop and try it, but we LOVE hidden finds like this!
When you go in, it looks like a typical package store (that’s a convenience store for you Michigan folks!) but there’s a little dining spot in the back. Nothing fancy, but details like that aren’t important when you’re passionate about good Indian food!
The owners were a very nice family from New Delhi, India. We chatted with the husband for awhile while his wife cooked our order. It’s always fascinating to learn about other people and what brought them to Western Massachusetts! I just love meeting new people!
We ordered the Chicken Saag, Chana Masala, Chicken Tikka, Pratatha, and Raita and they were all DELICIOUS! We especially liked the Chicken Saag and Chana Masala! We practically inhaled it! Even my son loved the Chicken Saag and he normally won’t go anywhere near anything with green in it!
The food was great and very reasonably priced. We will DEFINITELY be dining there again. If you are ever in the Hinsdale area and LOVE and appreciate good Indian food, please support this business.
A final thing I wanted to add...
Please know that I do not make any money from this blog and get nothing for free. I am not asked to visit or review any of the places that I write about. I do this strictly for fun and as a way to catalogue my family’s adventures. Hopefully, it will inspire you to visit and support some of these businesses though and go on some adventures of your own. Thank you for reading and thank you for supporting local businesses!
To read a little history about Monument Mountain, go to: http://en.wikipedia.org/wiki/Monument_Mountain_%28reservation%29. To read more reviews of the Monument Mountain hike, go to: http://www.tripadvisor.com/Attraction_Review-g41586-d2008981-Reviews-Monument_Mountain-Great_Barrington_Massachusetts.html.
Subscribe to:
Posts (Atom)