Sunday, December 30, 2012

Flint Crepe Company

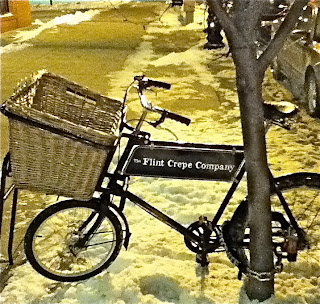
    My family took a trip back "home" to Flint, Michigan for the holidays and were eager to try out the Flint Crepe Company in downtown. We heard many good things about this restaurant and wanted to see if it would live up to the hype. 

   We were not disappointed! The crepes were delicious! I was thrilled that my crepe was thin and slightly crispy (I can't stand pancake-like crepes). There was also a generous portion size of the filling, which made me happy! I was instantly addicted and wanted to order a second one! 

   I apologize for the poor quality pictures. It was late at night (just before closing) and all I had with me was my iPod.


   While searching the Internet for a website for the Crepe Company that I could post a link too (they don't have one), I stumbled across some rather entertaining reviews of the restaurant. Some common complaints listed were the prices of the food and the poor customer service. I found these complaints particularly amusing seeing that we are coming from the land of uninterested hipsters (aka Northampton) and overpriced food. We thought the food was reasonably priced and the service was decent, so don't let these reviews discourage you. The food was worth the trip. 

   What was more important for me to see was something positive happening in Flint. Flint has a special place in my heart and I'll never stop loving it. I give credit where credit is due. I applaud the people who have stayed in the city and are trying to successfully run their businesses and make a positive change. Happy Holidays Flint! I celebrate your successes!

   Check out the Flint Crepe Company's Facebook page at https://www.facebook.com/FlintCrepe.

Yellow weather ball at night.

Monday, December 10, 2012

Homemade Christmas Ornaments/Recipe for Salt Dough Ornaments

   All of last week, I was chomping at the bit at work for the weekend. I couldn't wait to be home with my family! I had big plans to make homemade Christmas ornaments all weekend with my child and I wanted to get started ASAP!

   I couldn't be more pleased with the way that they turned out! Just like cards, ornaments are more special to me when I know little hands have worked hard on creating them. All I see is the beauty and goodness in something when I know it comes from a place of love!

   Anyhow, if you have any questions about the way that any of these are made, please comment your question on either the Blogger website or my Facebook page. They're very easy and pretty self-explanatory. The most important item you will need for all of them is a GLUE GUN. If you are a mom and you don't own a glue gun, you need to run to the store right now (Michael's, Jo-Ann's, Hobby Lobby, etc.) and buy yourself one! You won't regret it! The glue gun has a been a life saver for me, not only for crafts but for many other magical mom tricks such as: fixing toys, patching holes so that ants don't get into your house, fixing the soles of shoes, its uses are endless! I also used a lot of popsicle sticks. These are good to have around the house too! If you are curious about what craft supplies might be handy to have at home, please refer to my older post on Art at Home


   Another fun Christmas activity to do with your kids is making salt dough ornaments. I'm not sure how long lasting they are, but they are fun to make and decorate. If you HAVE to throw them out, at least you'll know that you didn't spend a lot of them AND you can have fun making them again next year! I've seen lots of variations of this recipe, but here's the recipe that I followed.

Salt Dough Ornaments

You will need:

2 cups flour
1 cup salt
3/4 cup warm water
Cookie cutters
Straw
Cooking spray
Paint, glitter, etc. to decorate
String


1. Preheat over to 225 degrees.
2. Mix flour and salt. Add water. Knead until soft (if dry, add more water).

3. Roll dough on floured surface to 1/4-inch thick. 

Cut with cutters. Add hole at top with straw. Put shapes on sprayed cookie sheet and bake 2 to 4 hours until hard, flipping every 45 minutes.
 4. Let cool completely. Decorate. Tie ribbon through hole.


To see my recipe for Cinnamon Cut Out Ornaments, click here.

Sources of inspiration:  http://www.usmagazine.com/celebrity-news/news/tori-spellings-kid-friendly-holiday-entertaining-tips-2012512, http://www.misseberhartsclass.com/christmas_ornaments.htm, http://www.thecraftycrow.net/2008/12/popsicle-stic-2.html.

Sunday, December 9, 2012

Handprint Santa Christmas Card

   Lately, I’ve been obsessed with homemade cards. They mean so much more to me than regular cards. Cards are more special when they are made with love! While researching homemade card ideas, I came across this little gem and had to recreate it with my child! It’s really easy and adorable!

You will need:

Paper
Red Paint
White Paint
Paint Brush
Peach or a Flesh Colored Paint
Marker
Cotton
Glue
Googly Eyes (optional)
Red Glitter Glue (optional)

Directions:

1. Fold your paper in half to make a card.
2. Take your child’s hand and paint the fingers (excluding the thumb) and top half of the palm with the white paint.
3. Paint the lower part of the palm and the thumb with the red paint.
4. Carefully place your child’s hand on the paper and push down on it.

 5. Let the paint completely dry.
6. Paint the peach or flesh color in the middle of the palm on the print. This will be Santa’s face. Let it dry.
7. Once dry, glue the cotton along the bottom of the hat and at the tip.
8. Use the marker to draw the nose, mouth, and words on the card.
9. Glue the googly eyes on the face.
10. Add glitter glue to the words.


 To see my source of inspiration, go to http://suite101.com/article/handprint-art-handprint-christmas-card-craft-and-poems-for-presc-a318806. 


Saturday, December 8, 2012

Buckeyes

Ingredients

3 cups confectioners’ sugar


1 cup creamy peanut butter

4 tablespoons (1/2 stick) butter, at room temperature or softened in microwave
 (who has time to let it sit!)
1 teaspoon vanilla extract

3 cups semisweet chocolate chips

Directions
1. Line a baking sheet with parchment paper.
2. In a bowl, beat together the sugar, peanut butter, butter, and vanilla (or you can mix it with your hands). The dough should end up slightly crumbly.
3. Roll the dough into 1-inch balls. Place the balls on the prepared baking sheet and stick a toothpick into each ball.

4. Place in the freezer and chill for 1 hour.
5. In a double boiler, or in a bowl snugly on top of a pan with a few inches of simmering water, melt the chocolate chips, stirring until smooth.

6. Holding a ball by the toothpick, dip it into the hot chocolate, leaving a small hole of the peanut butter dough showing at the top of the ball as the “buckeye.” Let the excess chocolate drip back into the pot. Put the buckeye to the baking sheet. Repeat with the remaining balls.
7. Cover loosely with plastic wrap and refrigerate.

8. Enjoy the delicious buckeyes with a nice glass of milk! Yum!

Tuesday, November 27, 2012

How To Remove a Pesky Price Sticker


   The other day I purchased a few Christmas cookie tins with huge price stickers on the bottom. As I started to attempt to peel one off, the sticker kept ripping into little sections, making it very difficult for me to remove it. I could see that these stickers were not going to come off without a fight! Another problem I was having was when and if I was able to remove the sticker, it would leave behind a sticky residue on the tin. I had to figure out a way to get these stickers off! Sure, I could have soaked all of the tins in water, but who has time for that? I needed another fast solution. After searching the Internet for all of the possible liquids I could rub on it (Seriously, who has lighter fluid handy? Vegetable oil sounds messy!) I came across a method that worked so beautifully, I just had to share it!

   I got out my good old hair dryer, blew it on the sticker for about 15 seconds, and the sticker came off without a problem, glue and all! That's it! How simple is that? I was thrilled! I saved myself so much time! Just be careful if you are doing this method with cookie tins like I did because those suckers can get hot! I love time-saving tips like this, don't you?


Sunday, November 11, 2012

Chex Mix

   Do you have certain foods or treats that you like to make only at certain times of the year? I know I do. One of those treats that shouts winter to me is Chex Mix. When I was little, it was tradition for my whole family to get together at my Grandmother's house on Christmas Eve. Everyone usually brought some kind of snack food and they usually always brought the same ones each year. One of those items I always looked forward to was my Aunt Kelly's Chex Mix. She didn't do anything special to it, it was just homemade and delicious and I could count on it being there every year! Now, every winter, I look forward to making Chex Mix for my own family and continuing the tradition with my own child.

   For my Chex Mix, I pretty much follow the recipe on the box like my Aunt did (Once again, I do not claim to have invented this recipe, I am simply sharing it. You can thank the General Mills or Ralston Purina people or Betty Crocker for creating it. Better yet, you could write to them to find out who invented it!). However, I have a small family so, I've made a few adjustments here and there. I also don't like certain ingredients so I've added some things and excluded others. Anyhow, the recipe I use for my small family is as follows: 

1 1/2 cups Corn Chex cereal 
1 1/2 cups Rice Chex cereal
1 cup Cheerios
3/4 cup peanuts
3/4 cup pretzels
5-6 Tbsp butter or margarine
2 Tbsp Worcestershire sauce
1 1/2 tsp seasoned salt (Lawry's)
3/4 tsp garlic powder
1/2 tsp onion powder

1. Mix cereals, nuts, and pretzels and put them in a glass rectangle Pyrex dish.  
2. Melt butter in a glass measuring cup or bowl in the microwave for about 40 seconds or until melted, taking it out to stir about ever 20 seconds. Add Worcestershire sauce and seasonings to the butter, stir, and then pour it over the cereal mix. Mix well. 
4. Microwave the mix in the Pyrex dish uncovered for 5-6 minutes stirring every 2 minutes. 
5. Remove from microwave and spread on paper towels to cool. Store in airtight container.

   The other great thing about making a small batch is that you have plenty of leftover ingredients for other tasty treats, such as Puppy Chow (or Monkey Munch for my East Coast friends)! You can click here for that delicious recipe!

   For the Original Chex Party Mix full recipe, please visit http://www.bettycrocker.com/recipes/original-chex-party-mix/2c7708d0-f7ba-423c-954c-128da4606f02.             

Thursday, November 8, 2012

How to Make a Handprint/Footprint Turkey

   I just want to start by saying that I did not invent this project. I saw it done somewhere else a long time ago (although I can't remember where) when I was teaching preschool and thought it was a cute project to do with my school kids and son. I am simply sharing it!

   I love to decorate the house for the holidays! Thanksgiving, however, is just one of those holidays that I don't have a whole lot of decorations for. That's why I LOVE stumbling across paper craft projects like this one! You need very little supplies to make it, you don't feel bad about throwing it away after the holiday, and it's easy to make again next year! I'm going to show you how to create a festive construction paper turkey using your child's handprints and footprints. 

Things you will need:

Four different colored sheets of construction paper (I used brown, orange, red, and yellow)
Pencil 
Scissors
Glue stick
Googly eyes (optional)

Directions:

1. To make the feathers, place both of your child's hands on one of the sheets of construction paper and trace around them. Cut both handprints out (I layered the 3 sheets and cut them all at once so that I wouldn't have to retrace his hands on each sheet OR you can use the first handprint and trace it). You will have 6 handprints total when you are done. 

We're only tracing one hand in this picture but you get the idea!

2. To make the body of the turkey, have your child stand on the brown construction paper and trace around both feet. Cut them out.


3. Glue the two footprints together at the heels so that the top part of the body is smaller and the bottom part is larger.

4. Using the orange paper, cut out two feet and a beak. 

5. Use the red paper to cut out a wattle.

6. Glue the feet, beak, wattle and googly eyes onto the body.

7. Glue the handprints on the back of the body, alternating colors so that they look like feathers sticking out. 


Now you have a fancy Thanksgiving turkey to hang in your home or in your classroom!


Saturday, November 3, 2012

How to Prepare for a Power Outage/Hurricane


WARNING: This article is area-specific. I live in the woods and hills of Western Massachusetts, so what I would do to prepare for a hurricane is very different than what someone in Florida would do (or the people in New York city). Please research the ways to prepare for a storm for your specific area if you are facing a natural disaster. 

   Growing up in Flint, Michigan, the only natural disasters my siblings and I ever had to worry about were snow storms and tornadoes. We didn’t do much of anything to prepare for a snow storm (except pray that school would be closed) or for a tornado. When we’d hear the sirens go off, we’d gather up all of our important belongings into our pillowcases and go sit in the basement (Unless you were my dad, in which case he would be listening to his Ham Radio and running outside to watch the funnel clouds. Apparently, he had no fear.). That was pretty much it. So when I moved out east and into a location where I didn’t have city water, I wasn’t sure what I needed to do to prepare when a hurricane was predicted last week. 
   Last year, during the massive October snow storm, we lived in the city so we still had access to water and we had a gas stove in our apartment (which was very helpful). However, it was still chaotic when we finally lost power. We drove for an hour in search of coffee. We eventually found one McDonald’s with power and there were so many people there that a line had formed out of the parking lot and down the street. I’ve never seen people in such a state of panic! People were pretty much camping inside, sipping coffee and making use of the free Wi-Fi. Eventually, we had to drive to New Hampshire to find a hotel room. It was pretty nuts. Anyhow, after doing some research and talking to the people that live in my city, I created a list of things that I needed to do in case the power went out. Here’s what I did to prepare for the storm:

1. Bought extra water. I knew we’d need water for drinking, cooking, brushing our teeth and washing our hands, so I made sure that I had several gallons and bottles.
2. I also put a gallon of water in the freezer to freeze. I read that if you have a large, solid block of ice in your freezer, your frozen items will stay cold longer after the refrigerator shuts off.
3. Bought a bag of ice. If we needed to put items in a cooler to travel somewhere, I wanted to be prepared. Obviously, the ice would have eventually melted had we been without power for days, but the idea was that if we needed to leave, we would have a way to save a few items while we were traveling.
4. Filled two large plastic storage containers with water from the hose, as well as filled our bathtub with water. This water was going to be used to fill the tanks of the toilets if we had to go to the bathroom. We put one container of water in our half bathroom, next to the toilet, and the other container we kept out in the garage (and then we had the bathtub of water in our full bathroom). If the power stayed out for days and we ran out of water, we planned on putting the containers out in the driveway to collect rainwater.
5. Ground a few days worth of coffee and stored it in air tight containers in a dark place. We also cleaned our French Press and put everything near each other so that we could easily make coffee in the morning.
6. Did laundry. We wanted to make sure our clothes were clean ahead of time!
7. Stocked up on propane for the grill. Unfortunately, we no longer have a gas stove so we needed something to cook on. We also had a small burner for camping that we should have purchased some fuel for, but we ran out of time and the stores ran out of supplies.
8. Stocked up on candles, matches, flashlights, and batteries. Luckily, we have these items all of the time so this wasn’t really an issue.
9. Stocked up on wood for a camp fire. If it wasn’t raining and we needed to cook, we planned on making a fire in our pit to save propane.

10. Planned meals. We had a lot of meals already in the freezer (because that’s what we normally do any way) so we already had some soup, chili, and meatballs that we could have thrown in a pot and put on the burner on the grill. We also purchased some hot dogs and tofu because we knew these things wouldn’t spoil as fast as raw meat. 
11. Purchased snacks and food that wouldn’t require cooking. We had a lot of bread, peanut butter, beef jerky, nuts, and fruits for snacking on (or if we ran out of meals). 
12. Charged our phones, computers, and iPods. We probably should have purchased some battery operated chargers too, but we didn’t get a chance to do that.
13. Filled the cars with gas.
14. Parked facing the street in our driveway. That way, we didn’t have to worry about backing out.
15. Picked up small items from the yard. We had some flower pots and building materials that could have been blown around so we just made sure we picked it all up and put it in the shed.
16. Stocked up on paper products and plastic ware. That way we wouldn’t have to worry about doing dishes. We also wanted plenty of trash bags, toilet paper, and paper towel.
17. Made sure all prescriptions were filled. We didn’t want to run out of medicine if the pharmacy was closed. 
18. Picked up things from the basement floor in case of flooding. We live on the side of a hill, so we didn’t have to worry too much about flooding but we wanted to be prepared just in case. 
19 Took out some cash. We didn’t take out large amounts of cash but we had some paper money on hand in case we needed it.
20. Stocked up on toiletries. You'll want to make sure you enough of your soap, shampoo, face wash, feminine hygiene products, and all of that good stuff. 

   So there you have it! That was our hurricane preparation list. Most of these things were easy because we just live this way all of the time. My dream is to make the house more self-sufficient so that won’t have to do much to prepare in the future (like converting the fireplace back to a wood-burning fireplace, fixing the chimney, getting a gas stove or one that can run on propane, and purchasing a generator that runs on propane). I learned a lot this fall and preparing helped me feel like I had more control if disaster was to strike. My heart goes out to all of the people in New York and along the east coast who couldn’t do anything to prepare or had to evacuate their homes! Please donate to help out the Hurricane Sandy survivors if you can! 

Tuesday, October 23, 2012

DIY-How To Make a Pinata

   Pinatas are a fun and festive game for any party! Who wouldn’t love lining up to take a swing at a big hanging object that is going to explode and give them candy? Sounds like fun to me! But pinatas can be so expensive! Not only do you have to buy the candy and prizes for the inside, but the pinata itself can run you anywhere between $12-$30+. Well not anymore! You’re going to learn how to make your own pinata and WOW your party guests with how crafty you are!

Things you will need:

A Balloon
Newspaper
Flour
Water
Bowl
Crepe Paper (for decorating it)
Construction Paper (for decorating it)
Glue (craft or Elmer’s type glue)

Directions:

1. Blow up your balloon to the desired size.
2. Make your paste mixture with the flour and water. The measurements should be 2 parts water to 1 part flour. For example, for a regular size balloon, I used a half cup of flour and one cup of water (I didn’t add the full amount of water because it was looking too runny, so my actual measurement may have fallen just short of 1 cup).
3. Tear or cut the newspaper into small rectangles (about 1 1/2 x 3 inches). Now you have your supplies. 


4. Place your balloon in a bowl to hold it. Dip your newspaper rectangles into the paste squeezing off the access liquid with your fingers and smooth it out on the balloon. Do this until you’ve covered almost the entire balloon. Leave a hole or bare spot around where the balloon is tied (this will be the hole where you put the candy in once you pop the balloon). 


5. Wait for the newspaper paper mache (or “Papier-Mache”) layer to dry completely (I waited about 2 days in between layers) and repeat steps 2-4. You will want about 3-5 layers depending on how strong you want the pinata to be and how much candy it will be holding.
6. Once you’ve completed all of your layers and they are completely dry, pop the balloon. You now have the basic shell of your pinata.  

   There are many different ways you can decorate or shape your pinata. I’ve seen people turn it into a horse or donkey by gluing on toilet paper holders and empty boxes. In my case, I was making a pumpkin so all I needed was orange crepe paper and some construction paper. To add the crepe paper, simply add a line of glue to the top of it and spiral it around the balloon. Once I completed this, I added some construction paper for the face of the pumpkin. Then I punched two holes on either side of the candy hole and strung a ribbon through it so that the pinata could hang. Then I added some construction paper leaves and a stem to cover up the candy hole. 


Some helpful tips:

1. Make sure you make the pinata somewhere that you won’t mind getting messy. The first time I attempted this, I was making it in my kitchen and the balloon popped while I was adding my first layer. The explosion got the white paste all over my kitchen cabinets and ceiling! After that, I decided to move everything down into the basement.
2. To make the string holes stronger, I added a piece of packing tape on both the outside and inside of the balloon shell before I punched the holes. This seemed to help the holes not to rip.
I once had my balloon pop between layers 1 and 2 while it was drying overnight (I think one of my cats may have been trying to play with it). This caused a big tear in my paper mache layer. I thought I was going to have to throw it out, but I was able to save it by putting a piece of packing tape on the inside of the shell, blowing up another balloon inside of the shell, and covering the rip with more paper mache. I then continued to make my paper mache layers.
3. This video http://video.about.com/familycrafts/How-to-Make-a-Pinata.htm is a great resource for making your pinata, especially to see how the crepe paper decorating can be done.


Sunday, October 21, 2012

Crunchy Pumpkin Seeds


   One of my favorite parts of Halloween is baking all of the pumpkin seeds I get from carving my pumpkin. When cooked properly, these crunchy, salty seeds can be quite addicting! Here's a simple recipe on how to make your seeds a tasty hit with any crowd!

You'll need:

A Pumpkin
Butter (or margarine) 
Salt

Directions:

1. Preheat your oven to 330 degrees.
2. Carve a hole at the top of your pumpkin to remove the insides.


3. Separate the seeds from the "guts."


4. Melt 1 stick of Margarine (or butter) in a glass measuring cup or bowl in the microwave until it is melted. Remove it about every 15 seconds to stir. (NOTE: You may need more butter depending on how many seeds you have. I use this amount for the seeds from 1-2 giant pumpkins.)
5. Pour the butter into the bowl of seeds and stir well.
6. Measure 1 Tablespoon of salt and pour into the bowl of seeds and stir well. (NOTE: Again, you may need to adjust how much you use depending on how many seeds you have and how salty you want them.)
7. Pour the bowl of seeds onto a baking sheet and spread them out so that they are all mostly flat on the sheet.
8. Bake for about 55 minutes.


A few extra tips:

1. We also included the seeds from a butternut squash we had used for making soup from the day before. These seeds are much smaller and harder to separate, but they turn out very tasty and can be used to add some crunch to your soup.
2. Another tasty seasoning to add to your seeds once they are on the baking sheet is Lawry's Seasoned Salt. Yum!

Tuesday, October 16, 2012

Outlook Farm & Digital Photography

   Fall is my favorite time of the year! I love breaking out the warm sweaters and cute coats in preparation of the cooler weather, watching the leaves on the trees change color and fall to the ground, putting out Halloween and fall harvest theme decorations around the house, but best of all, visiting apple orchards! Growing up in Michigan, apple orchards were a must on the list of "places to visit" in the fall. Each orchard would host an "Apple Festival" on one of the weekends in September or October where families could go apple picking, take a hay ride, shop craft booths, pet farm animals, make jump ropes, look at old farming equipment, pick out pumpkins, watch how apple cider was made and eat delicious food! You could indulge in all sorts of tasty treats such as hot dogs, bean soup, popcorn, candy sticks, caramel apples, apple cider, and best of all, hot, crisp, fresh out of the oven, apple cider donuts! These donuts were amazing! Nothing was as crunchy or delicious as these donuts! Just thinking about fall makes my mouth water for donuts! Anyway (I got a little off track thinking about the donuts), when we moved to western Massachusetts, we were bummed to learn that apples and apple festivals weren't really the thing around here. Blueberries and blueberry picking are more popular. It was devastating for a Michigan transplant! Fortunately, after some research, I was able to find a charming little orchard along Route 66 in Westhampton that made me feel like I was back in my home state.


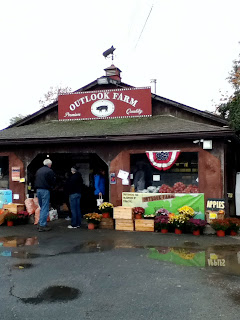
   Outlook farm hosts two festivals in the fall: an apple festival in September and a pumpkin festival in October. Both festivals feature a hay ride, apple picking, and tons of delicious food such as soup, sandwiches, apple cider, donuts, candy sticks, and a pig roast and barbecue. While the donuts aren't quite as fresh and crisp as what we're used to back home (I'm telling you, those donuts are hard to beat!), Outlook has amazing cookies! The molasses spice cookies are to die for! Outlook is a wonderful place to take the family in the fall and and the festivals are a fun, annual event to look forward too. It makes transplants like us feel at home! This year, unfortunately, it was raining during the pumpkin festival so my pictures aren't that great, but we still had a great time and I think you'll get the idea!


   For more information about Outlook Farm, visit http://outlook-farm.com/index.html. To visit some of my favorite orchards in Michigan, go to Spicers in Fenton http://www.spicerorchards.com/, Wolcott Orchards in Flint http://www.wolcottorchards.net/, or Almar Orchards in Flushing http://www.almarorchards.com/.

   And now a few words about digital photography... You may be surprised to learn that I made the switch to digital photography only a few years ago (back in 2008). When my father closed his photography studio, we bought his camera and have used it every since. In that amount of time, I've probably had to learn at least a dozen different programs for altering my pictures. I've also recently switched from a PC to a MAC, so I'm still navigating those changes (which explains part of the reason for my long gaps in posts). There have been things about each picture program that I have loved and things that I have hated, but I'm always excited and willing to learn new things and improve where I can. Still, I admit, sometimes I miss film. I took a black and white photography class in college and I fell in love with the process of developing film! My friend and I were very close to investing in the equipment to create our own darkroom, but I moved out of the state shortly after the class so there was no way we could do it. There's something very real and pure about film but I love having the ability to improve my art. I just can't help myself when it comes to playing with my pictures. While I don't believe in perfection, I like making something that I see in my mind come to life in a photograph and being able alter it until it is close to perfect (brightening a color here, removing a blemish there). Anyhow, I hope you will and have enjoyed my photographs. I wish I could dedicate more time to taking them, but I also believe in everything in moderation and finding a balance in life. Thank you for reading!


Tuesday, September 11, 2012

Williamsburg Snack Bar & The Village Greenhouse

   If you've ever traveled down Route 9 in Haydenville between Look Park and downtown Williamsburg, you've probably noticed the Williamsburg Snack Bar. I recently stopped to try out one of their lobster rolls and it was delicious! A favorite with locals, all of the food is reasonably priced and tasty (I've also had their fish and chips). There's ample seating at the picnic benches or you can dine in the comfort of your car.


   Right next door is The Village Greenhouse. They have a wide selection of flowers and plants and a small selection of local vegetables. They also have an ice cream window, which is the perfect place to stop after dining at the snack bar! I personally love the small playground where your little one can run around while you enjoy your ice cream! A great stop when traveling out to the hilltowns!